Conditional formatting in new Outlook and web to highlight emails
Make Your Important Emails Stand Out with Conditional Formatting in the New Outlook
Now available in the new Outlook and Outlook on the web, conditional formatting lets you easily color-code your emails so the important ones are easier to find.
This handy feature has been around in classic Outlook for years, helping people personalize their inbox by changing how emails look based on certain rules. Now, it’s finally here in the new version too—so you can stay organized and never miss what matters most.
Table of Contents
Conditional formatting in new Outlook and web
Highlight Important Emails with Conditional Formatting
Conditional formatting helps you spot important emails faster. You can set rules based on things like who sent the message, what’s in the subject line, or if your name is mentioned. Then, Outlook will automatically highlight those emails with different colors, so you can easily see which ones need your attention right away—without digging through all your other messages.
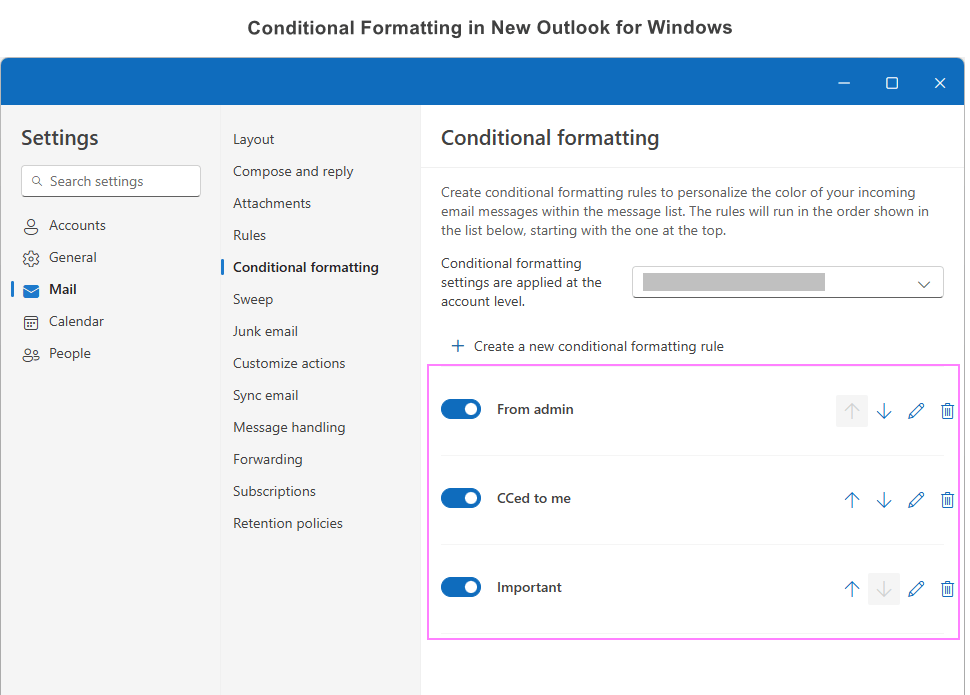
How to use Outlook conditional formatting to highlight emails
How to Set Up Conditional Formatting in the New Outlook and Outlook on the Web
In both the new Outlook app and the web version (used with work or school accounts), setting up conditional formatting is pretty much the same. While the screens may look a little different, the steps you follow are almost identical.
Here’s how to create a rule to color-code your emails:
- Open Settings
Click the gear icon (⚙️) in the top-right corner. Then go to Mail > Conditional Formatting. - Pick the Right Account
If you’re using multiple email accounts in the new Outlook, make sure the right one is selected. (If you’re using just one account or you’re on the web version, you can skip this.) - Create a New Rule
Click + Create new conditional formatting rule to start making your rule.
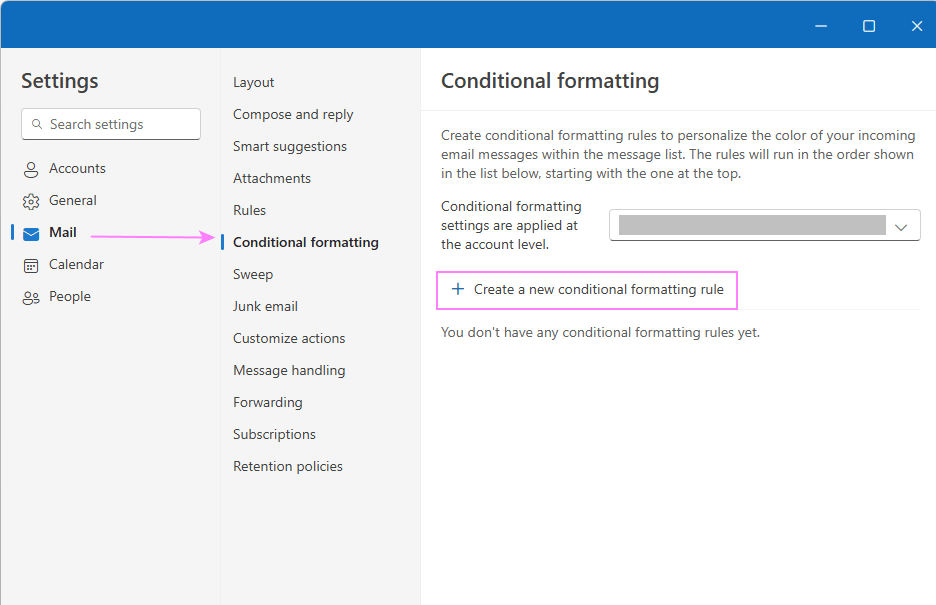
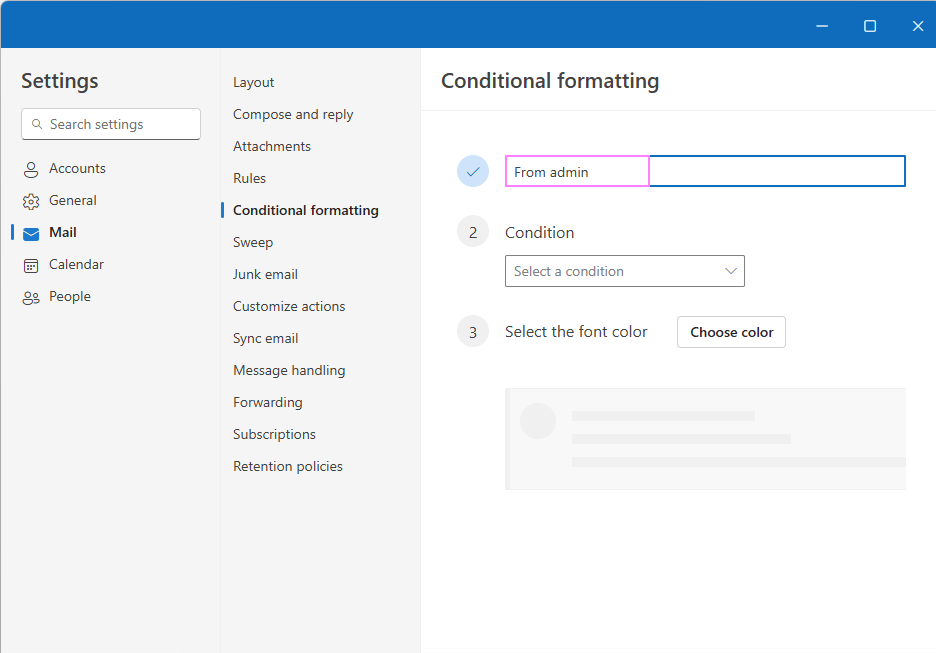
Name your rule. In the first box, type a name that will help you identify the rule later.
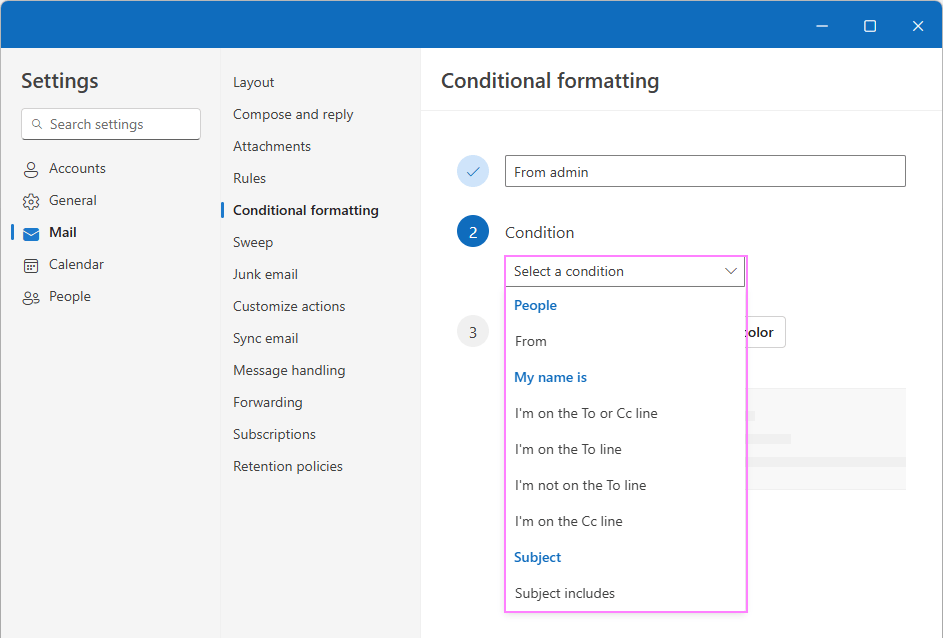
Set the Conditions for Your Rule
Next, choose what will trigger the formatting. Click the Condition dropdown and pick the rule you want. Right now, the new Outlook and web version offer a few basic options, such as:
- Emails from certain people
- Your name is (or isn’t) in the To or Cc line
- The subject contains certain words
If you want to add more than one rule, click + Add another condition and set up the extra ones.
Choose the format. Click the Choose Color button, and then pick the font color for your rule. The Preview section will display how the text will appear with the chosen formatting.
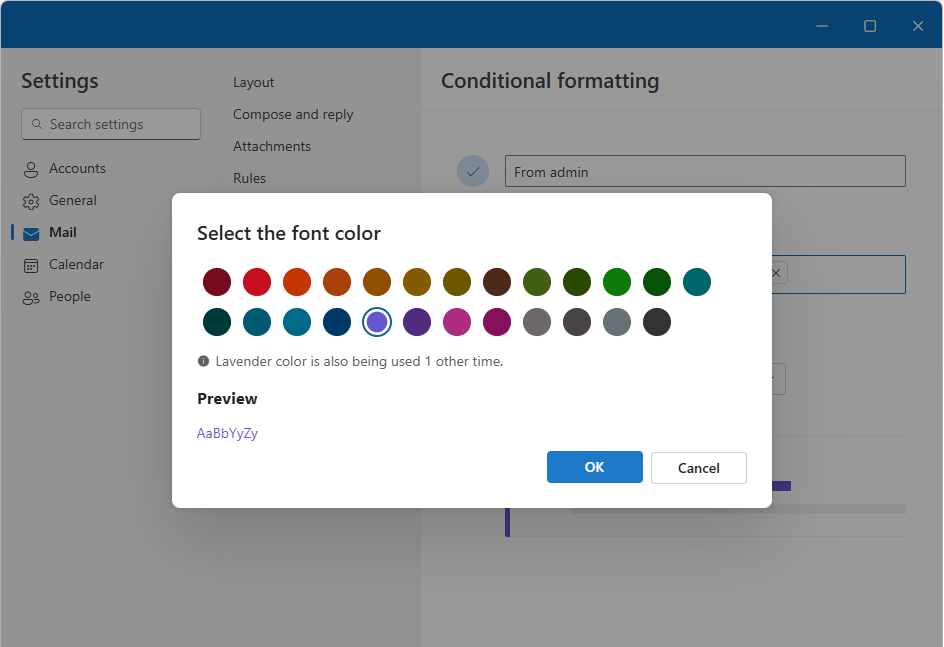
Save the rule. After setting up your conditions and formatting, click the Save button to apply the changes and save your new rule.
By following these steps, you can highlight critical emails in different colors, making them easily identifiable in your mailbox folders.
How to edit a conditional formatting rule
How to Edit a Conditional Formatting Rule in the New Outlook and Outlook on the Web
Editing a conditional formatting rule is easy in both the new Outlook app and the web version. Whether you want to change the rule’s conditions or update how your emails are highlighted, the steps are almost the same.
Here’s what to do:
- Open Settings
Click the gear icon (⚙️) in the top-right corner. Then go to Mail > Conditional Formatting. - Choose the Rule to Edit
You’ll see a list of your existing rules. Find the one you want to change and click Edit next to it. - Make Your Changes
You can update the rule’s name, change the conditions, or pick a new color or style. You can also add more conditions or remove any you no longer need. - Save Your Changes
Click Save when you’re done. If you change your mind or made a mistake, click Discard to cancel the changes.
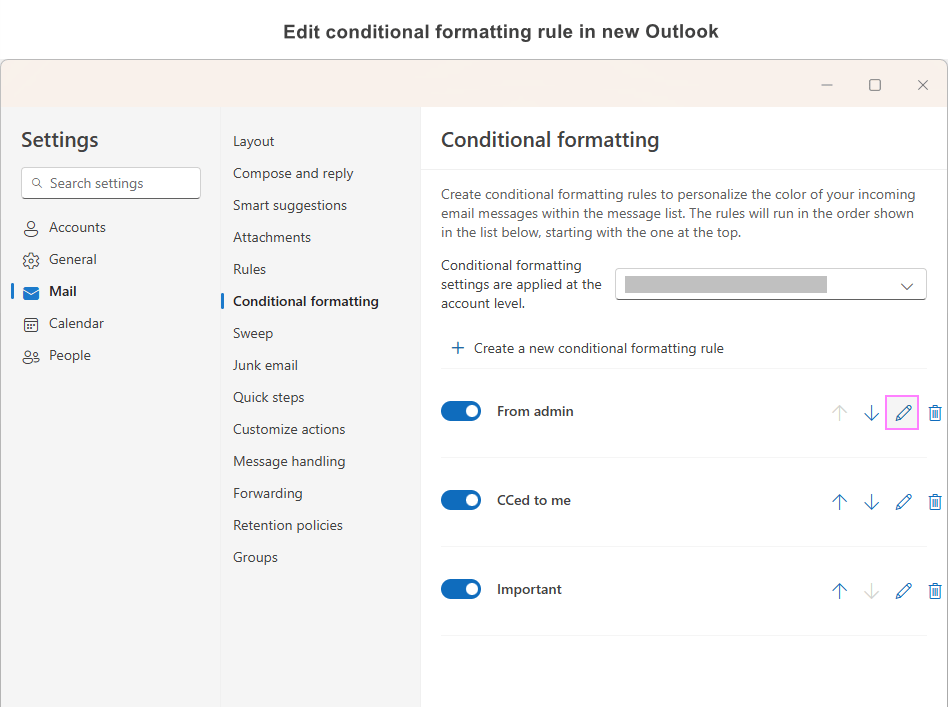
Remember, you can always come back and edit your rules to better suit your workflow.
How to delete a conditional formatting rule
If you no longer need a specific rule, you can easily remove it from your Outlook app. This helps keep your email management clean and ensures that only necessary rules are applied. Here’s how you can delete a conditional formatting rule:
- Access Settings. Click Settings > Mail > Conditional Formatting.
- Delete the rule. In the list of conditional formatting rules, locate the one you want to remove and click the Delete rule button next to it.
- Confirm deletion. When prompted, confirm that you want to delete the rule.
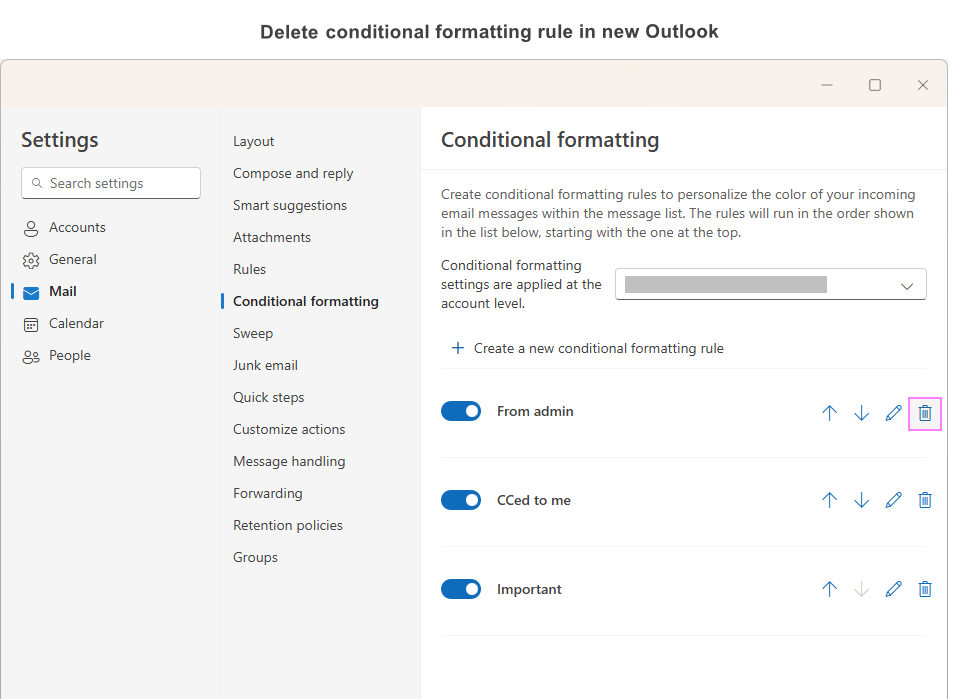
This will permanently remove the unwanted rule from your Outlook, keeping your email environment clean and organized.
How to turn a conditional formatting rule off and on
Sometimes you may want to temporarily disable a conditional formatting rule without deleting it. This allows you to quickly turn the rule back on when needed. Here’s how to do it:
- Open the Conditional formatting settings.
- In the list of rules, use a toggle switch to turn a certain rule on (enable) or off (disable).
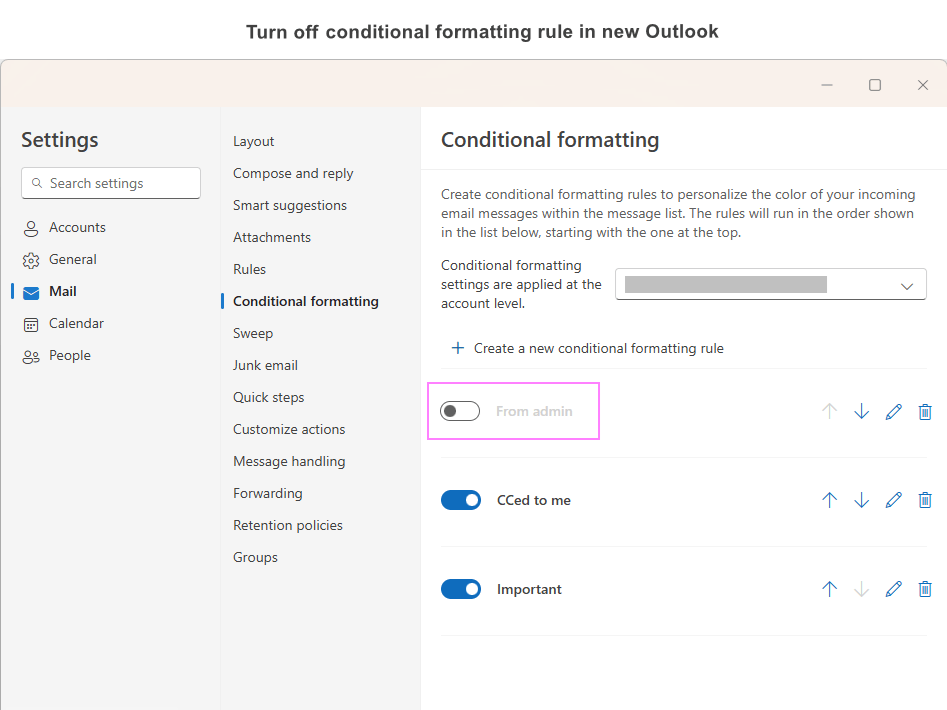
This feature allows you to adapt your email management strategies on the fly and maintain control over your inbox organization with minimal effort.
How to change the rules order
Why the Order of Conditional Formatting Rules Matters in Outlook
In Outlook, the order of your conditional formatting rules is important because they’re applied one after the other—from top to bottom. Rules at the top have higher priority and can override the ones below them.
Here’s an example:
- Rule 1: Emails from the admin are highlighted in blue
- Rule 2: Emails with “important” in the subject are highlighted in red
If Rule 1 is above Rule 2, then any email from the admin—even if it has “important” in the subject—will be blue.
But if Rule 2 is on top, then those emails will be red instead.
To change the order of your rules, go to the Conditional Formatting settings and use the Move Up or Move Down buttons.
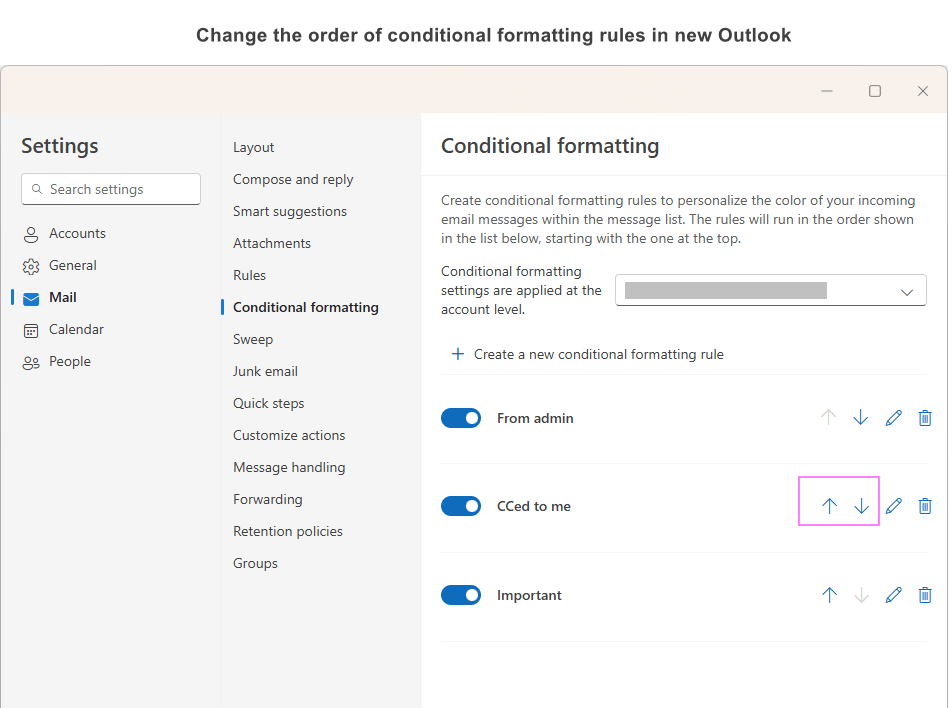
By organizing the order of your conditional formatting rules, you can control which rules take priority, ensuring that your most important formatting criteria are applied correctly.
Limitations and differences of new Outlook conditional formatting
Things to Keep in Mind About Conditional Formatting in the New Outlook and Web Version
Conditional formatting in the new Outlook and the web version is a great tool, but it does have some limits compared to the classic desktop Outlook. Here’s what you should know:
- Who Can Use It: It only works if you have a Microsoft 365 work or school account.
- Where It Works: The rules apply to all folders, including read and unread emails—but not to Drafts.
- Fewer Rule Options: The new Outlook and web version have fewer condition choices than the classic Outlook.
- Emails Only: You can only use it for emails—not calendar events or tasks.
- Limited Formatting: Right now, you can only change the font color. You can’t change the font style or size.
Knowing these limitations can help you set up smarter, more useful rules.
Hopefully, this guide helped you learn how to use conditional formatting in the new Outlook. With color-coded emails, it’s easier to stay on top of what matters—so nothing important slips through the cracks!
Click here for more blogs


