Introduction
Efficient work allocation is crucial for organizations and teams to ensure that tasks are distributed effectively, deadlines are met, and team members remain productive. Microsoft Outlook and Excel are powerful tools that, when combined, can simplify and enhance the process of work allocation. In this article, we will explore how to create and use an Outlook-based Excel tool for effective work allocation.
Benefits of Using Outlook and Excel for Work Allocation
Before diving into the specifics, let’s briefly discuss why using Outlook and Excel for work allocation can be advantageous:
Integration: Microsoft Outlook and Excel seamlessly integrate with each other, making it easy to manage tasks, schedules, and contacts in one place.
Accessibility: Outlook is widely used for email and calendar management, making it easily accessible to most team members. Excel, on the other hand, is a versatile tool for data organization and analysis.
Customization: You can create custom Excel templates to suit your organization’s unique work allocation needs.
Automation: By utilizing Outlook rules and Excel formulas, you can automate parts of the work allocation process, saving time and reducing errors.
Setting Up Your Outlook-Based Excel Tool
Step 1: Define Your Work Allocation Needs
Before you begin creating your tool, it’s crucial to have a clear understanding of your organization’s work allocation requirements. This involves defining:
Types of Tasks or Emails: What kinds of tasks/emails need to be allocated? These could include project tasks, routine assignments, or specific responsibilities.
Task Assignees: Who are the team members or individuals responsible for these tasks? Ensure you have a list of all potential assignees.
Task Details: What information is necessary to allocate tasks effectively? Common details include task names, descriptions, allocation dates, and any dependencies.
Step 2: Create an Excel Template
Open Excel and Create a Spreadsheet: Open Microsoft Excel and create a new spreadsheet. This will serve as your work allocation template.
Design Your Template: Design your template by creating columns to capture essential information. A basic template might include columns such as Task Name, Assigned To, Due Date, Priority, Status, Description, and Project Name.
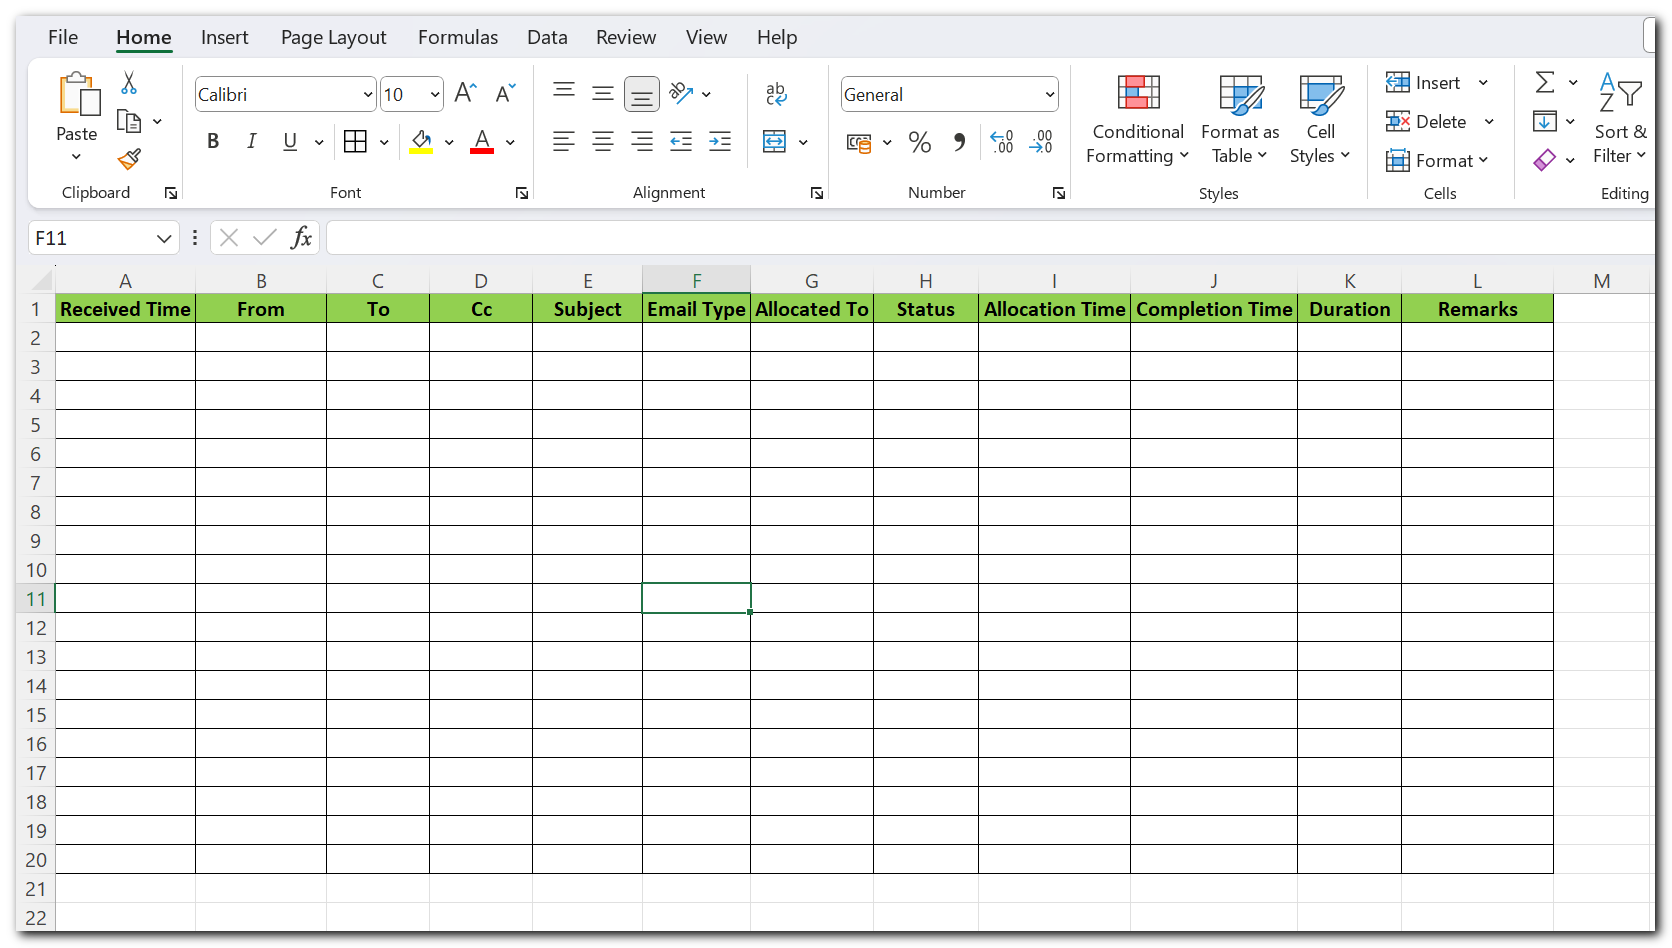
Customize as Needed: Customize the template to match your organization’s specific needs. You can add or remove columns, change formatting, or include additional details that are relevant to your work allocation process.
Data Validation: To ensure data consistency, use Excel’s data validation feature to create drop-down menus for fields like “Assigned To” and “Priority.” This helps prevent errors and ensures that users select from predefined options.


Step 3: Integrate with Outlook
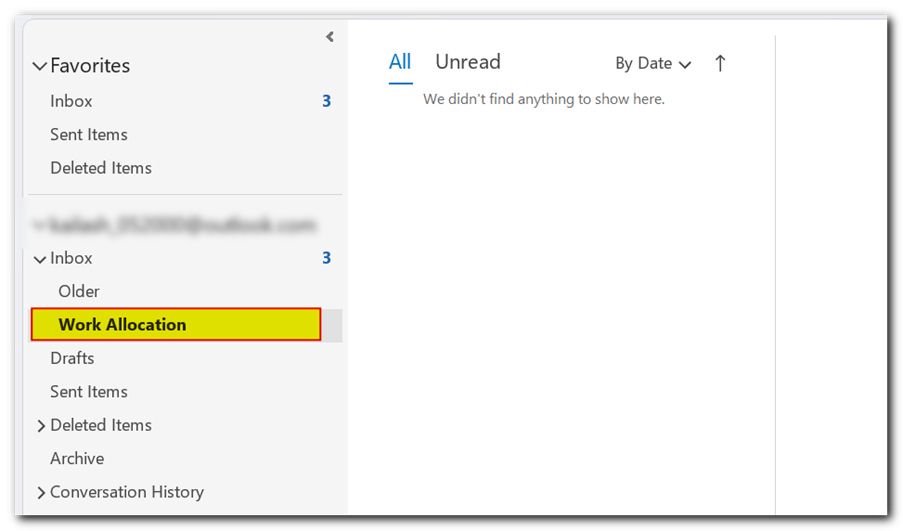
Create an Outlook Folder: In Microsoft Outlook, create a dedicated folder for managing work allocation tasks. You can name this folder “Work Allocation” or something similar.
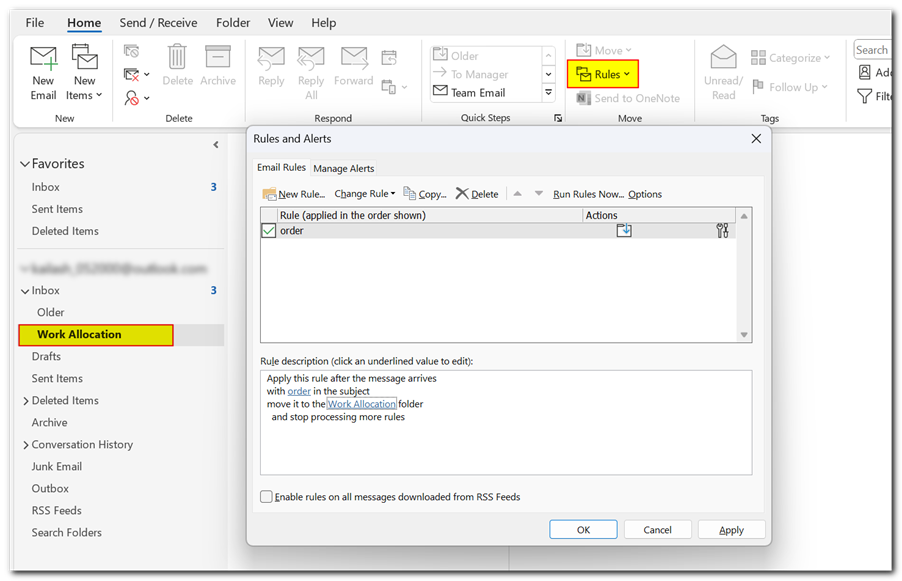
Set Up Outlook Rules: Configure Outlook rules to automatically sort and forward work allocation emails to your designated folder. This ensures that all task-related information is centralized in one location.
Step 4: Populate the Excel Template
Extract Task Information: As work allocation emails are received in your Outlook folder, extract relevant task information such as task name, assignee, due date, and priority.
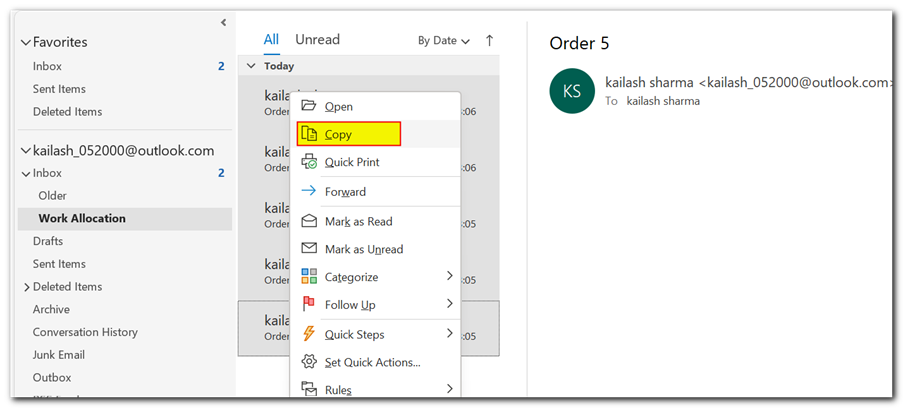
Populate the Excel Template: Manually enter the extracted task information into your Excel template. Alternatively, for more advanced users, consider using Visual Basic for Applications (VBA) macros to automate this process further.
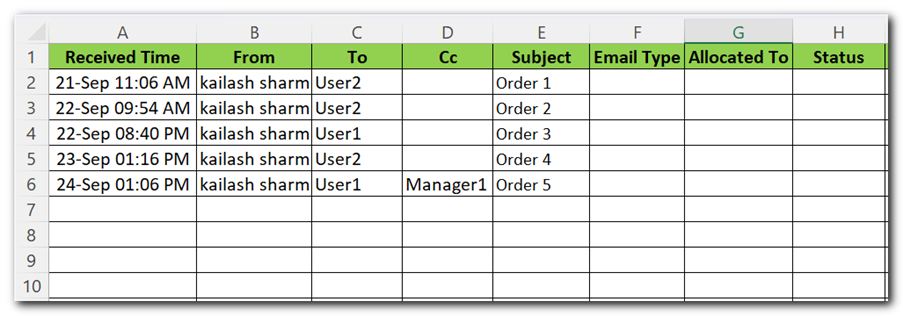
Use Excel Formulas: Utilize Excel formulas to calculate task durations, track task progress, and generate reports if needed. For example, you can calculate task completion percentages based on the status column.

Managing Work Allocation
With your Outlook-based Excel tool in place, you can effectively manage work allocation within your organization:
Task Creation: When a new task needs to be assigned, create an entry in your Excel template by filling in the relevant information. Include details like the, assigned team member, allocation date, Email Type and Remarks.
Task Updates: As team members work on their assigned tasks, regularly update the Excel spreadsheet to reflect the current status. Use status columns to indicate whether tasks are in progress, completed. For simultaneously work on one Excel file by all team members, you can save the file in OneDrive, SharePoint, Teams etc.
Task Monitoring: Utilize Excel’s filtering and sorting features to monitor task status, identify bottlenecks, and reassign work when necessary. This provides real-time visibility into work allocation progress.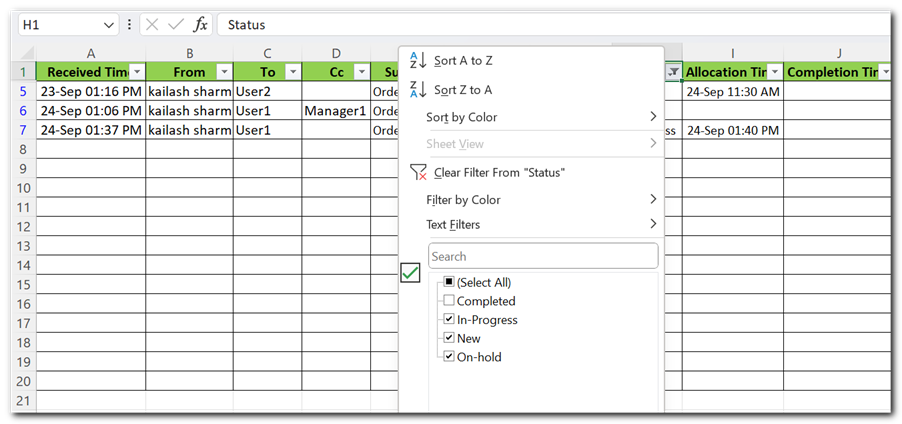
Reporting: Generate reports and charts from Excel to gain valuable insights into work allocation trends, task completion rates, and team performance. These reports can help you make data-driven decisions to improve your work allocation process.
Conclusion
Download Free Excel Template
You can make use of free Excel template from ExcelSirJi team to simplify your work.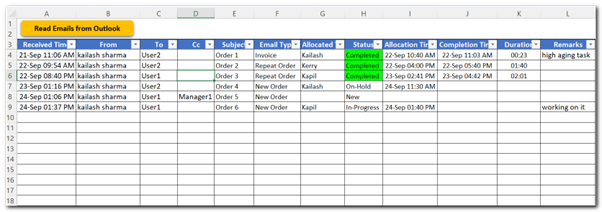
How to Use this Template
- Download the template from below link.
- Save the template in Teams, OneDrive, SharePoint etc where all intended users can access the file.
- Use ‘Read Emails from Outlook’ button to list all emails from selected Outlook folder to this sheet.
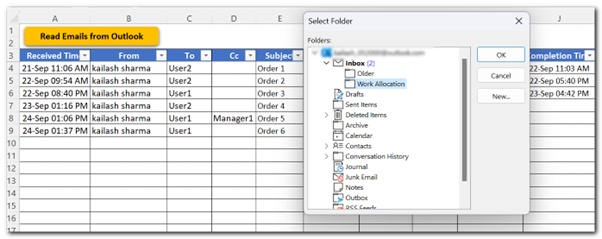
- Allocate the emails to users by mentioning their name in Allocated To column.
- Ask your team members to filter the data with their respective names.

- Team members are update their respective emails by updating Status, Completion Time and Remarks

