How to Print Row Header on Each Page in Excel – 3 Easy Ways
However, this doesn’t automatically apply when printing. By default, only the first printed page has the header row, while other pages don’t—making it hard to follow data on later pages without headers.
To make it easier, you can set to print row headers on each page in excel
In this guide, I’ll show you how to print the top row on every page in Excel. Let’s dive in!
1. Print Row Header on Each Page in Excel
The data below shows the monthly sales for different stores
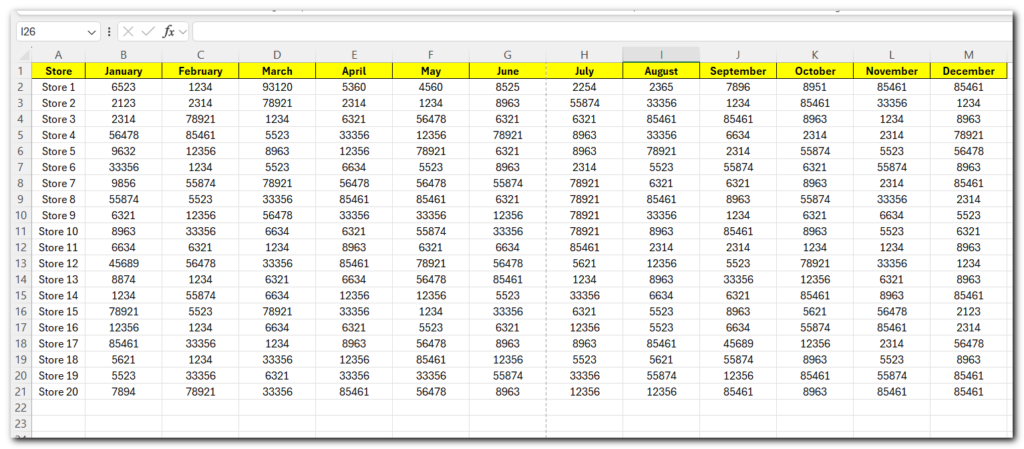
If you print this data, it would take up multiple pages, but the heading will only appear on the first page
Here’s an easier way to set up repeating headers on every printed page in Excel:
- Go to the Page Layout tab.
- Click the Page Setup arrow (small arrow icon in the corner).
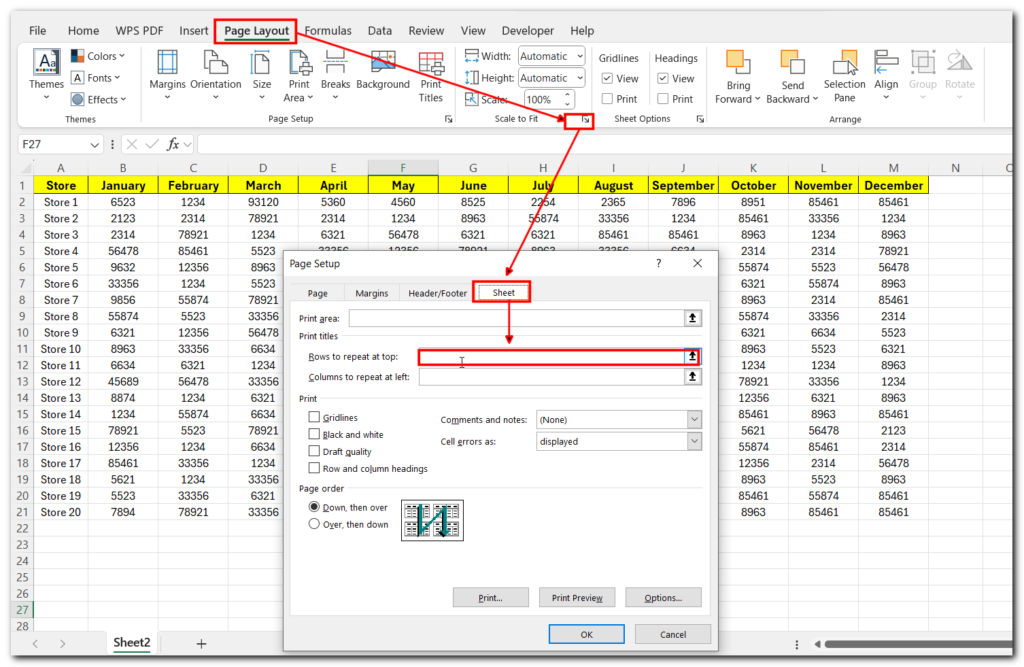
- In the Sheet tab of the dialog box, click the box next to Rows to repeat at top.
- Select the top row(s) you want to repeat on each page. Excel will add the row reference (like
$1:$1). - Click OK.
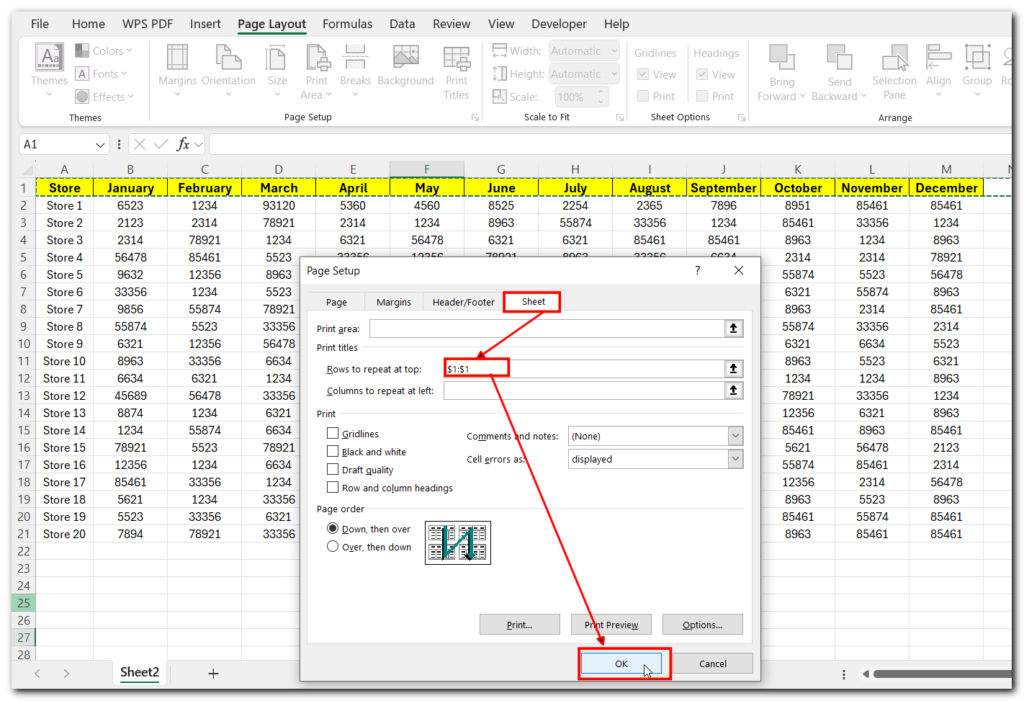
Now, when you print this data, the top row header will repeat on every printed page.
To check this, click on the File tab, then select Print. This will open the Print Preview pane, where you can see how the pages will look
This will Print Row Headers on Each Page in Excel
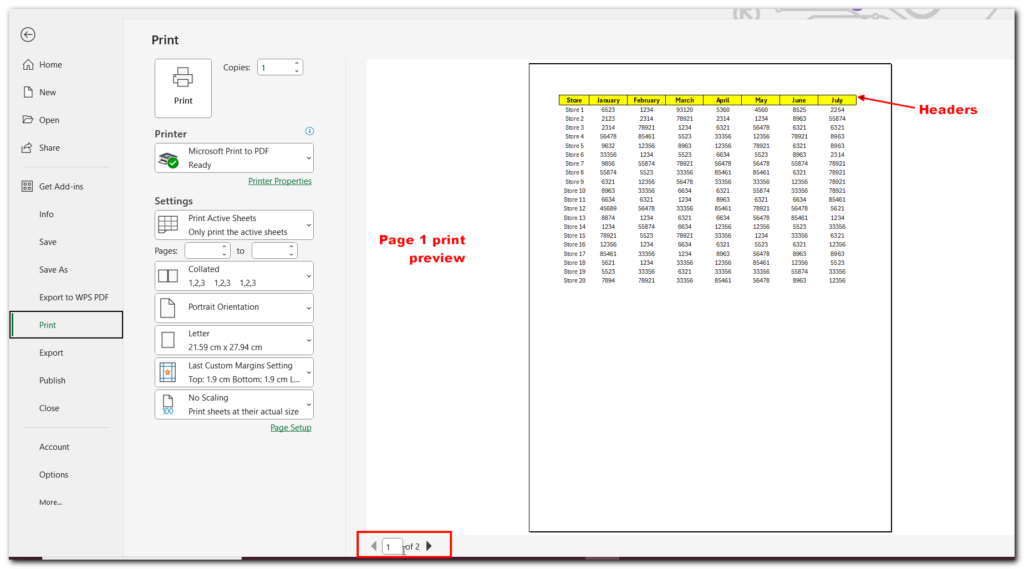
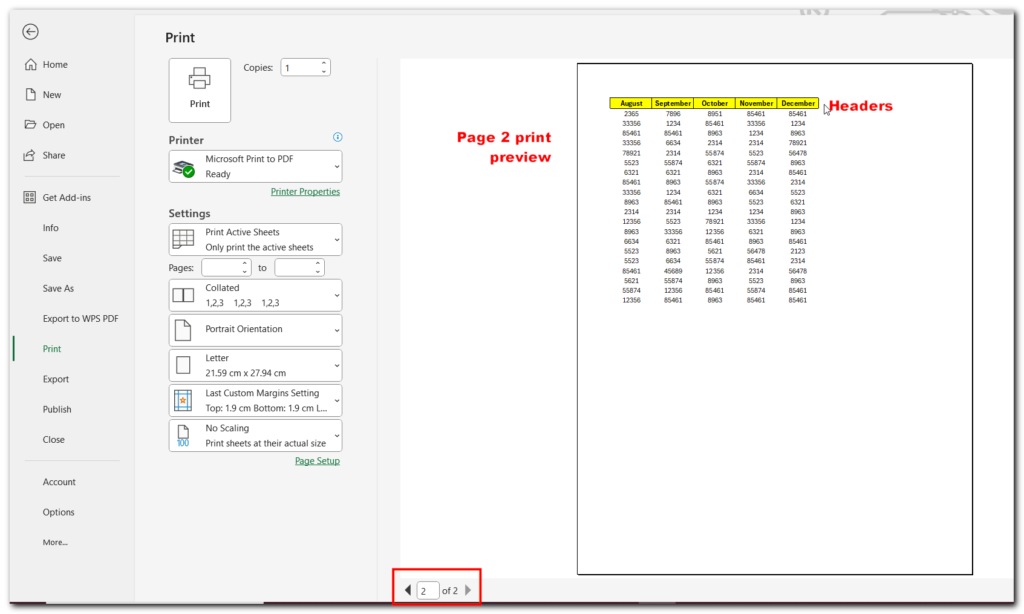
Print Row header on each Page in Excel Using the NameBox
Here’s a simple example of how to do this:
- Select the Header Row: Click on the row that contains your headers.
- Click on the Name Box: This is the small field next to the formula bar.
- Type in “Print_Titles”: Manually enter Print_Titles in the Name Box.
- Press Enter: Hit the Enter key.
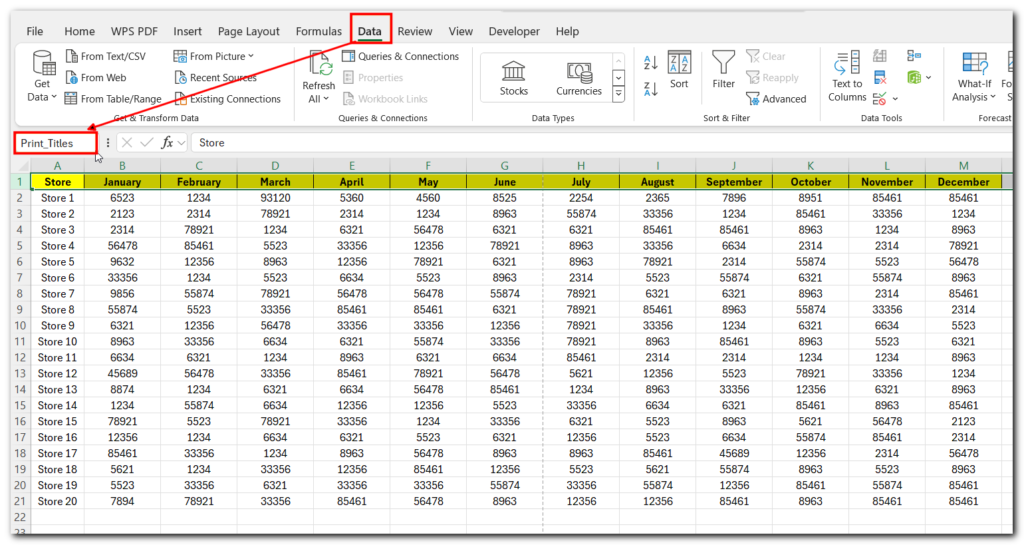
That’s it! Now, when you print your dataset, the first row will repeat on every page.
If you want to repeat multiple header rows or columns, just select them first and then name them as Print_Titles.
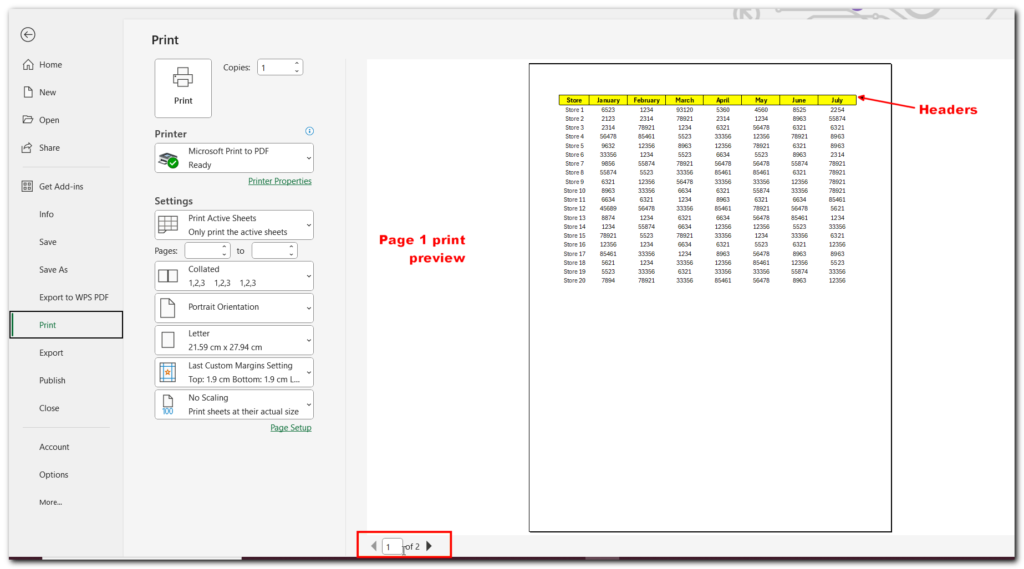
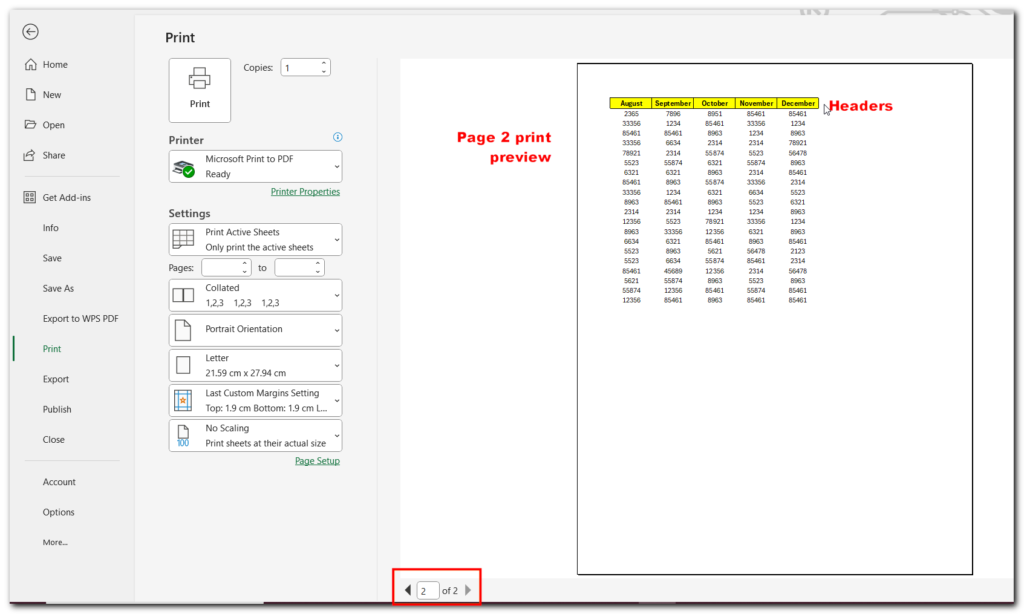
Why This Works?
When you use the Page Setup dialog box to specify which rows and columns should repeat, Excel automatically creates a Named Range called Print_Titles. This named range tells Excel to include those selected rows or columns on every printed page, ensuring that your headers are visible, making it easier to read the data across multiple pages.
So, instead of going the Page Setup dialog box route, if you create the same Named Range yourself, that would work too. By doing this you can print row header on each page in excel easily.
3. Print Column and Row Headers in Excel
To see the column and row headers in your prints, follow these steps.
- Go to the Page Layout tab and look for the Sheet Options section.
- Under Headings, check the box for Print
.
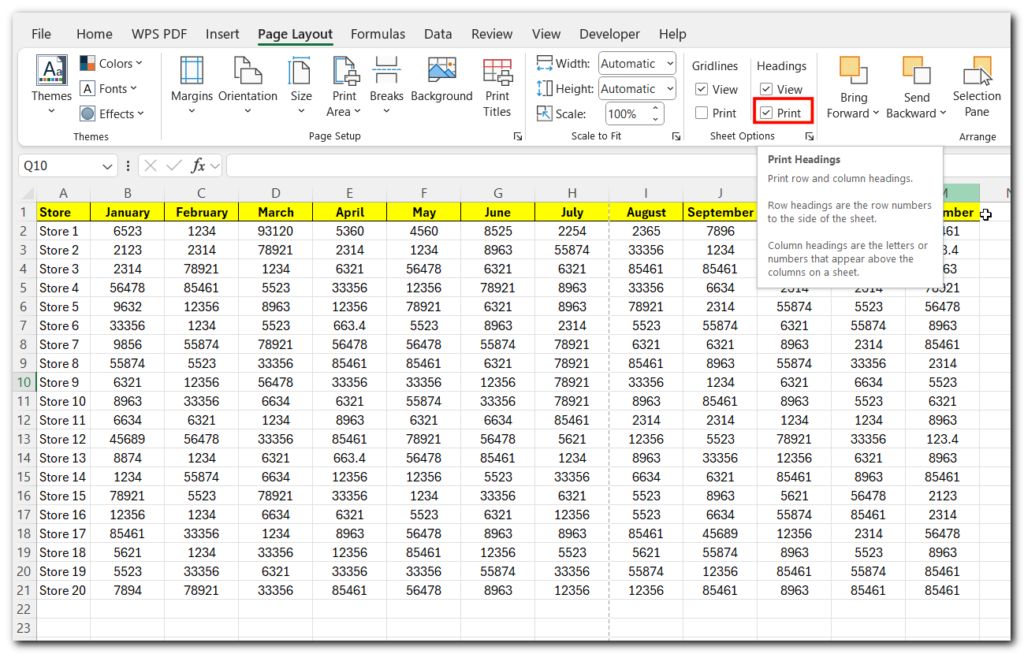
And that’s it—you’re all set!
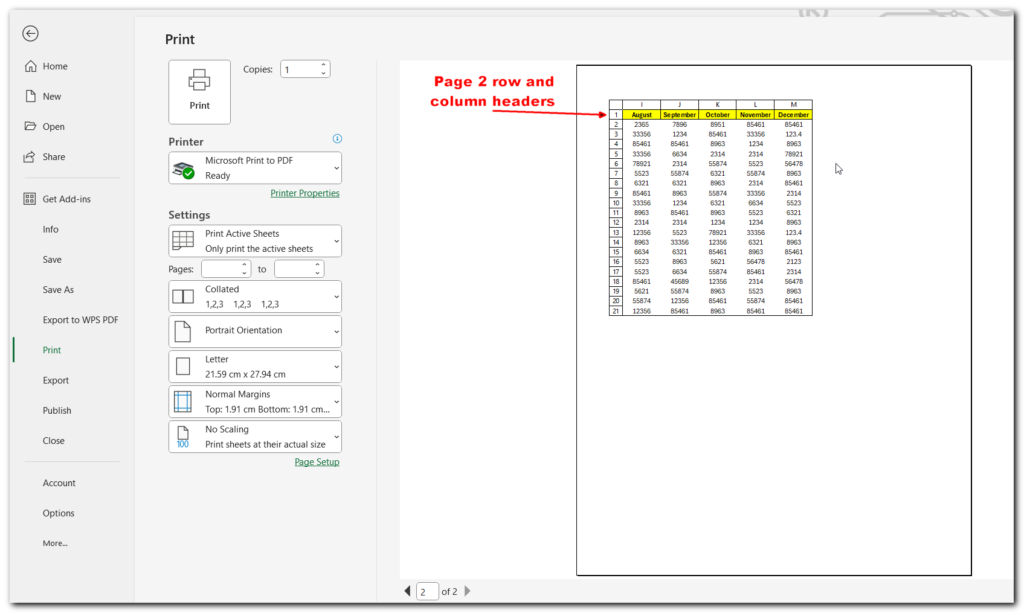
Press Ctrl + P to preview the print.
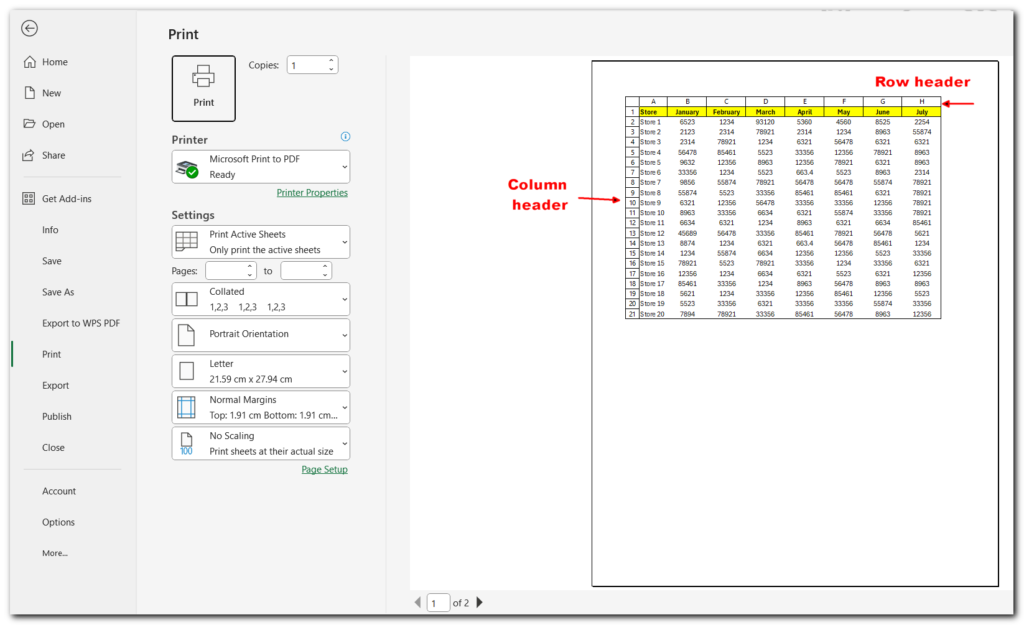
Alternatively:
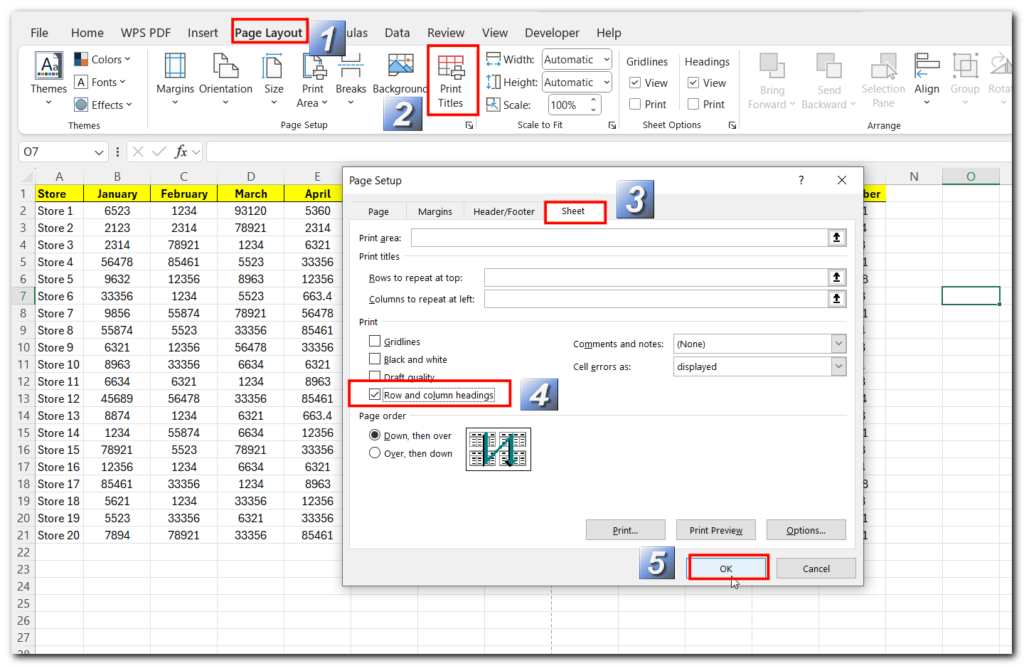
- In the Page Layout tab, click Print Titles.
- In the Page Setup dialog, go to the Sheet tab.
- Under “Print”, check “Row and Column Headings”.
Now, hit Ctrl + P to preview your print! You’ll see row and column headers on each page—easy and efficient!


