How to Print Gridlines in Excel – 3 Easy and Quickiest Way
Understanding Gridlines in Excel
Before learning how to print gridlines, it’s important to know what they are. Gridlines are the light lines around cells in Excel that separate rows and columns. They make it easier to read and understand data, whether on your screen or on paper. By default, Excel doesn’t print gridlines, but you can easily turn them on and even adjust how they look.
Lets learn “How to Print Gridlines in Excel.“
Method 1:- Print Gridlines in excel with Page Layout Tab
A simple way to do this is by using the Page Layout tab, which you can find on the ribbon as:
- Go to the Page Layout tab.
- Find the Sheet Options group.
- Check the Print box under Gridlines.

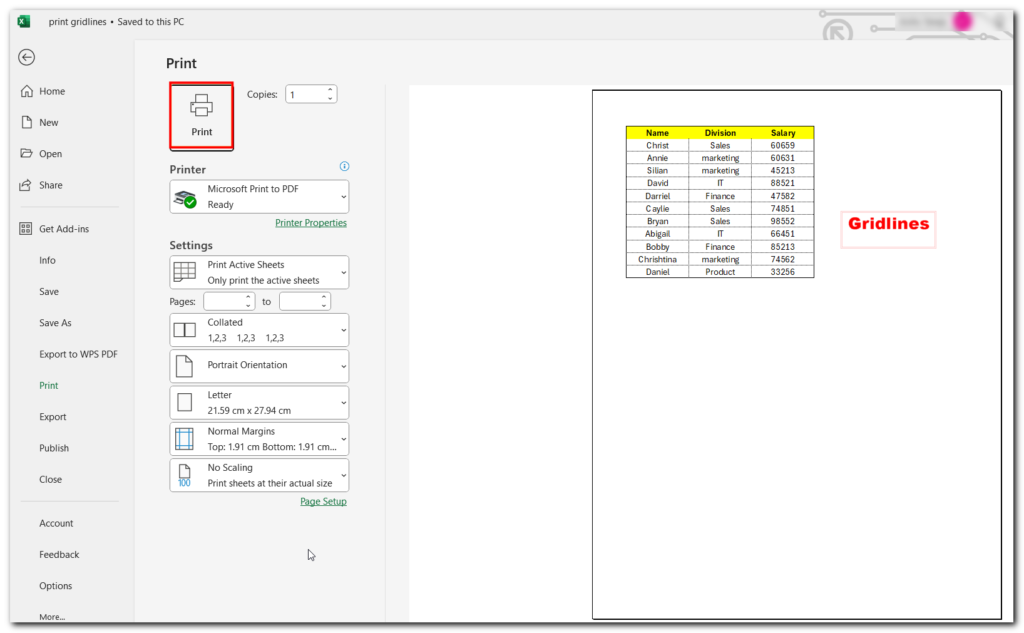
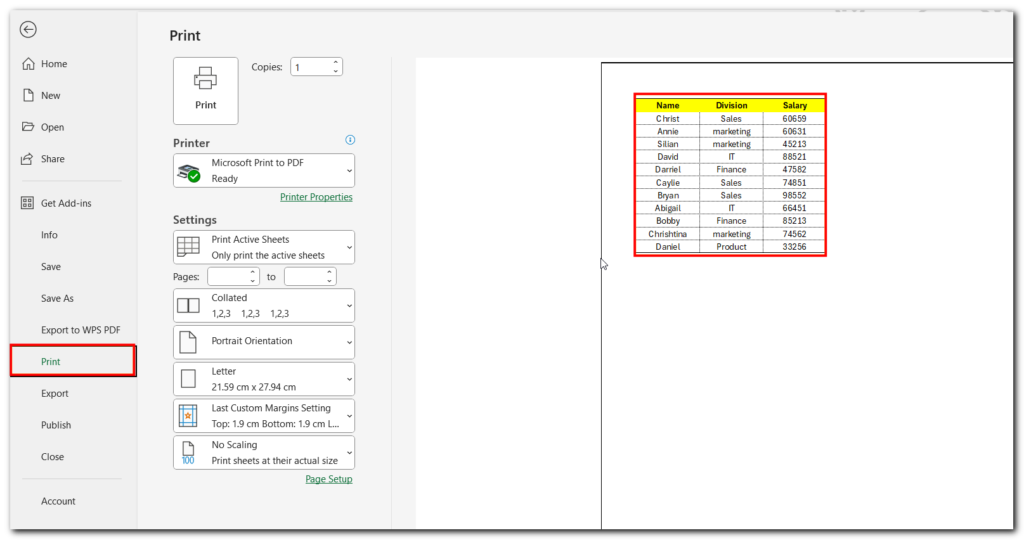
- To print your sheet, press CTRL + P (or Cmd + P on a Mac), or go to File -> Print. This will open Print Preview mode.
- Once you click Print, the gridlines will appear on the printed sheet and the preview mode.
- You’ll see a preview of your page on the right. If it looks good, click the big Print button on the left to start printing.
Method 2:- Print Gridlines in Excel the Print Preview
Follow these steps to display gridlines in the Print Preview menu:
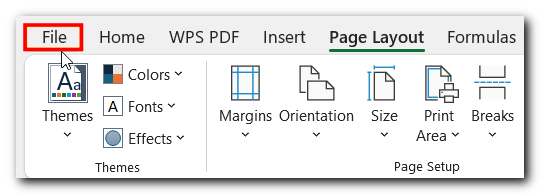
- Go to the File tab on the ribbon.
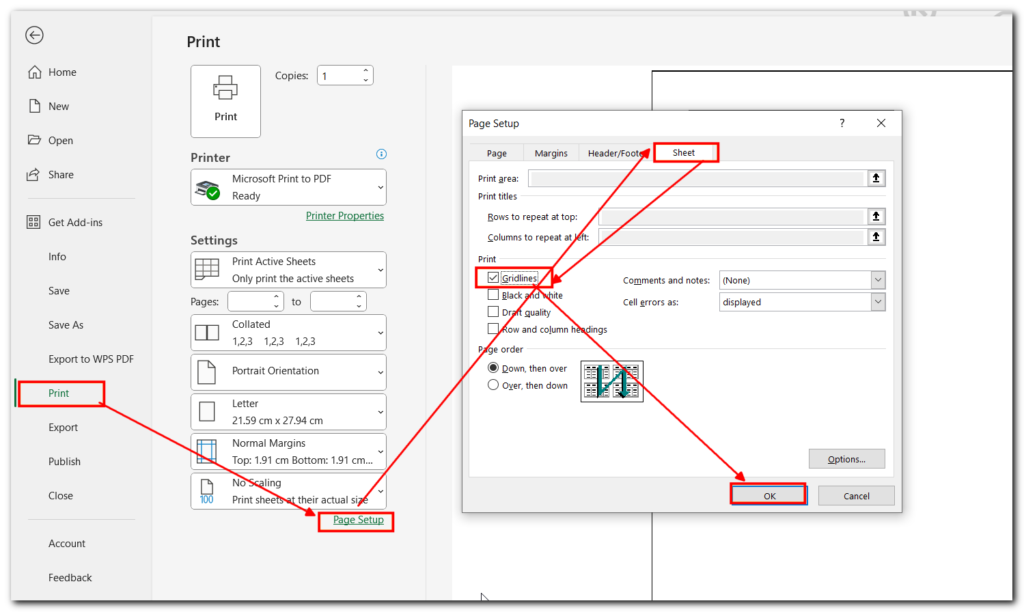
- Click on Print options.
- Then click the Page Setup link at the bottom of the main print settings.
- This will open the Page Setup menu.
- Go to the Sheets tab.
- Check the Gridlines option.
- Click OK
This will take you back to Print Preview mode, where you can see how the page looks with the gridlines added.
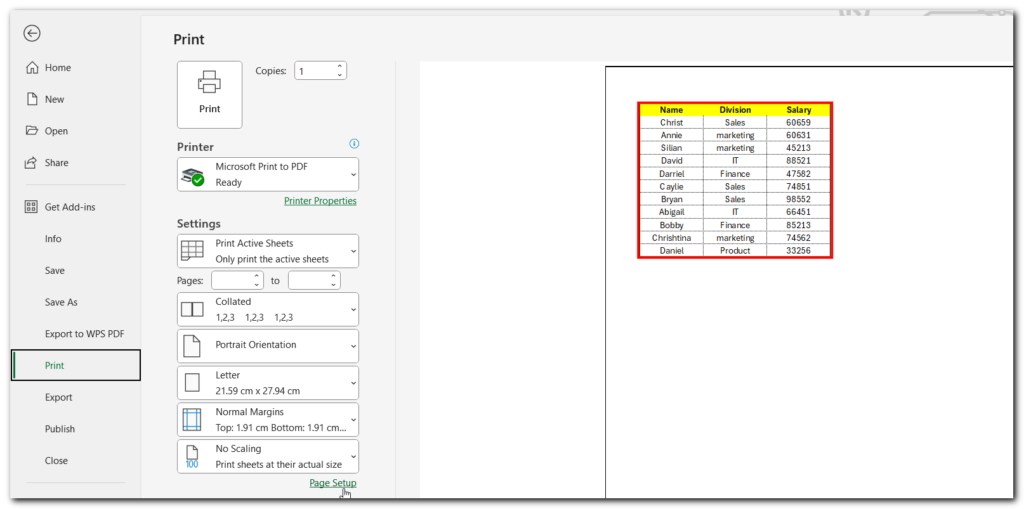
To go back to your worksheet, click the back arrow at the top left. If you want to print, click the Print button at the top. This is a good choice since you’ll likely want to check the Print Preview before printing. Page Setup is easy to access and lets you adjust settings like enabling gridlines before printing.
Method 3:- Print Guidelines in Excel Using Page Setup Launcher Tool
- Go to the Page Layout tab, find the Page Setup section, and click on the small arrow in the bottom-right corner to open the Page Setup dialog box.
In the dialog box, go to the Sheet tab and check the Gridlines box.
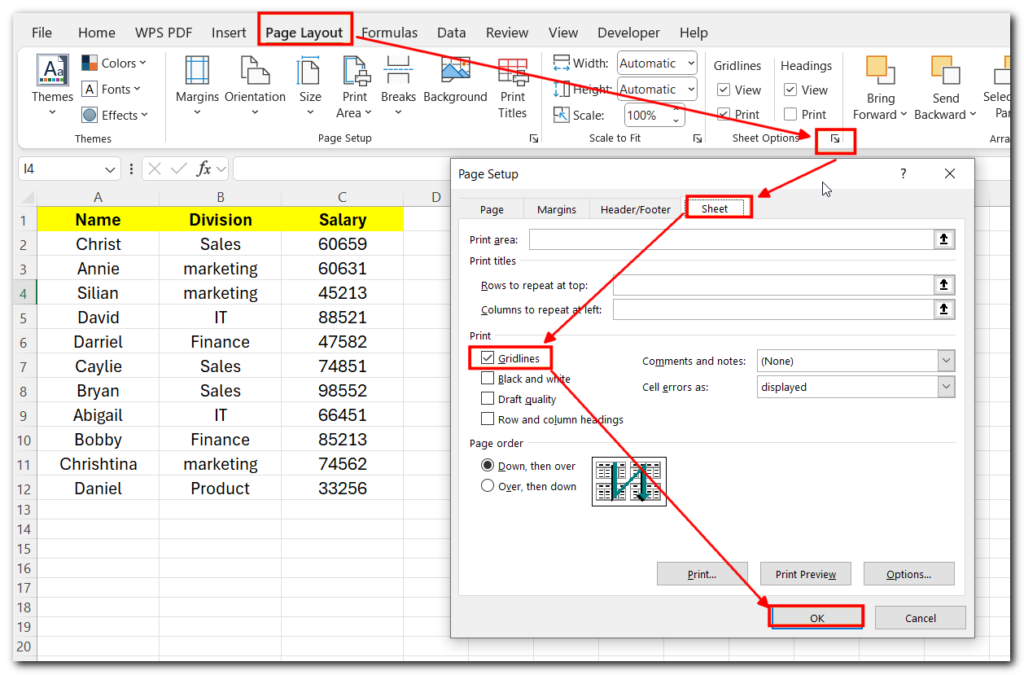
- To continue working on your worksheet, click OK. The gridlines are now ready for printing. If you want to print right away, click the Print button. To review everything before printing, click the Print Preview button.
Download Practice File
Conclusion:-
We hope these tips help make your printed pages easier to read and look better.
Other Excel tutorials you may like:
Few Simple Excel Tips – Excel Learner Should Know
CONDITIONAL FORMATTING In Excel
Create Pareto Chart In Excel


