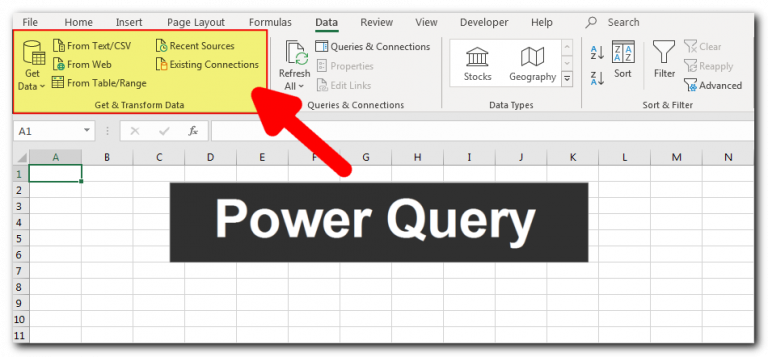
Streamline Your File Organization with Power Query: A Step-by-Step Guide
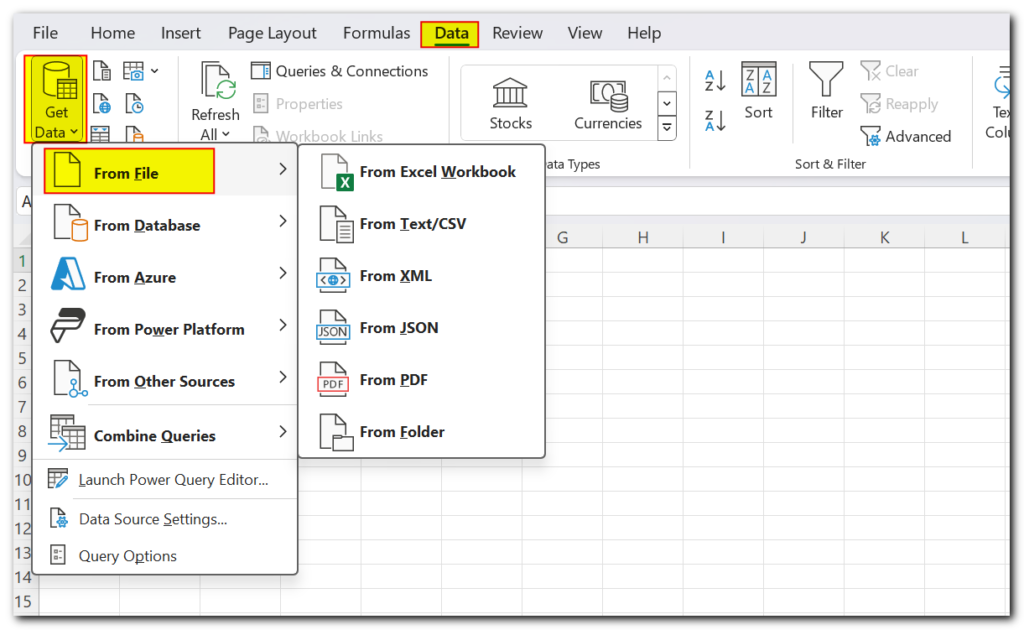
In today’s digital era, efficient file management is essential for productivity and organization. Whether you’re handling work documents or personal files, mastering effective file organization techniques can save you time and effort. In this step-by-step guide, we’ll walk you through the process of using Power Query in Excel to extract a list of file names from folders and subfolders.
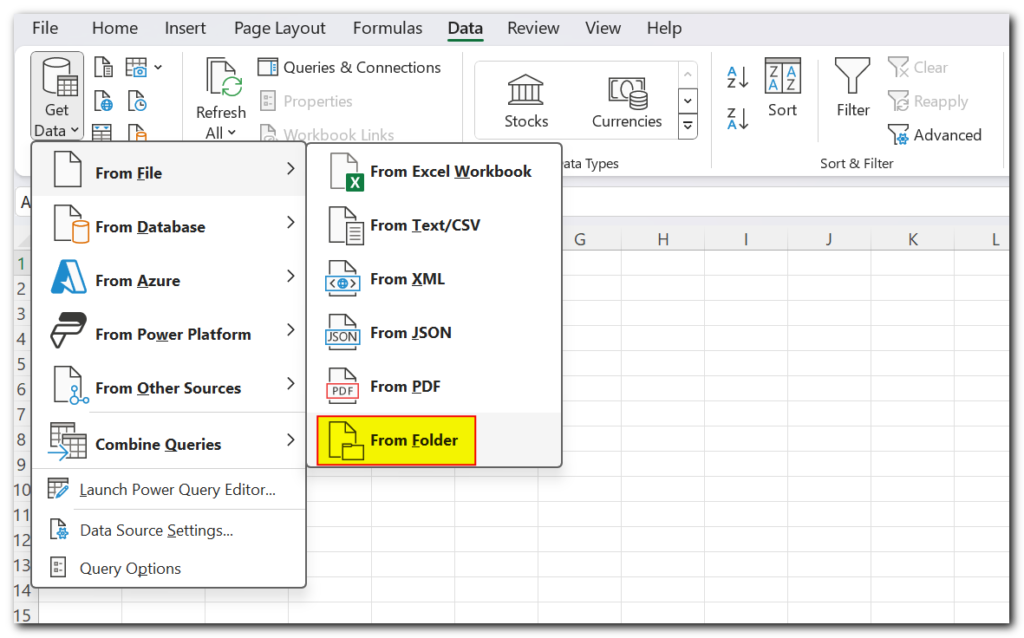
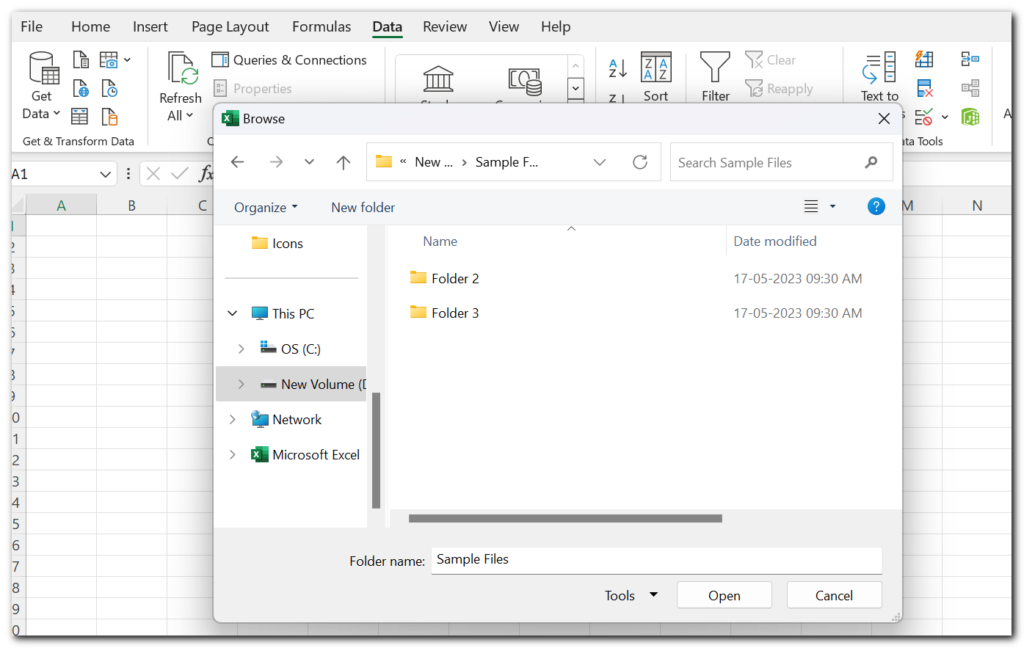
Step 2: Select the Folder
Browse and select the base folder that contains the files you want to list.
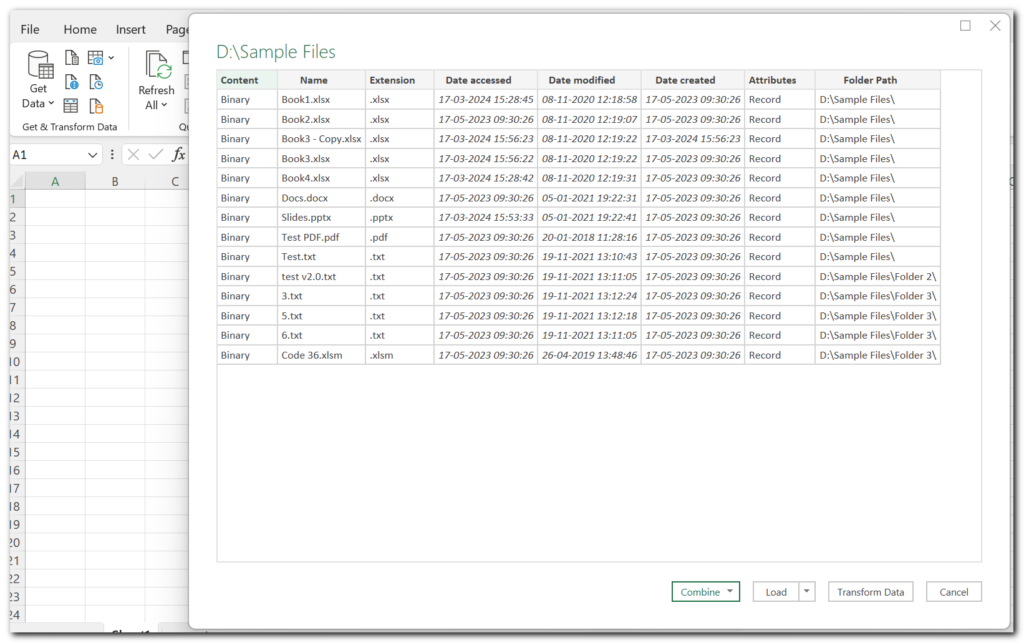
Preview the files and their details to ensure you’ve selected the correct folder.
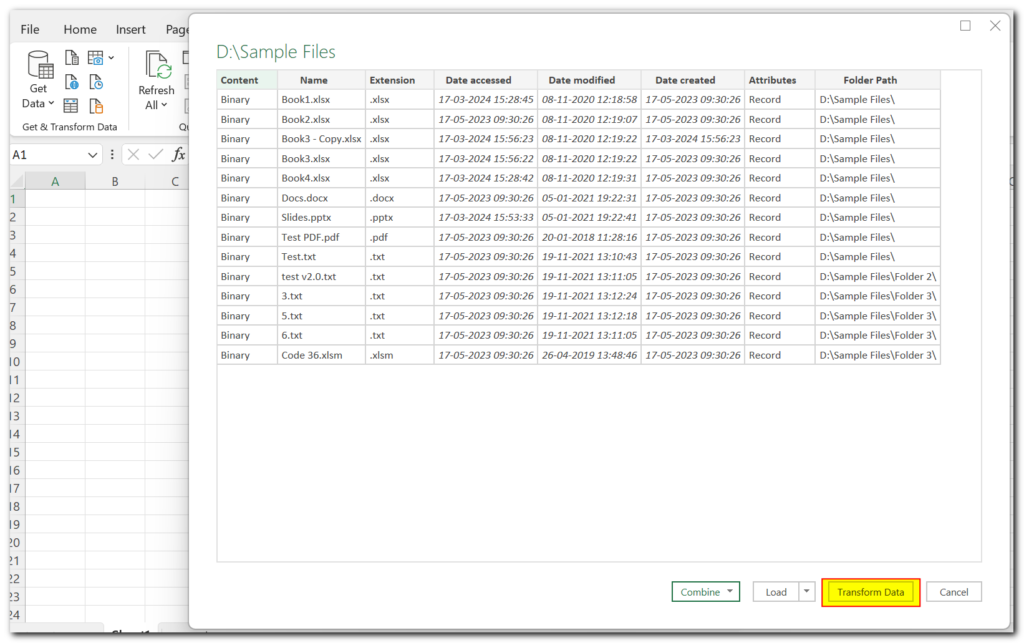
Step 3: Customize Your Query
Click on “Transform Data” to enter the query editor.
Customize the query to fit your requirements:
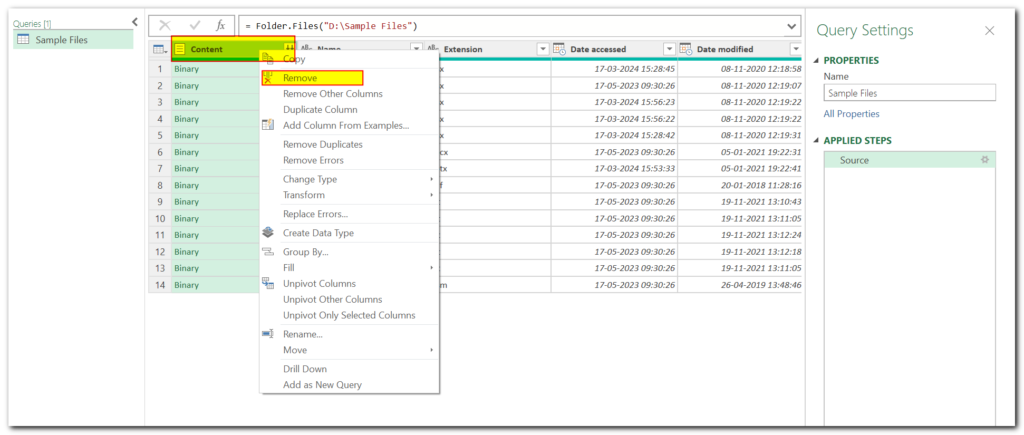
- Remove unnecessary columns, such as content.
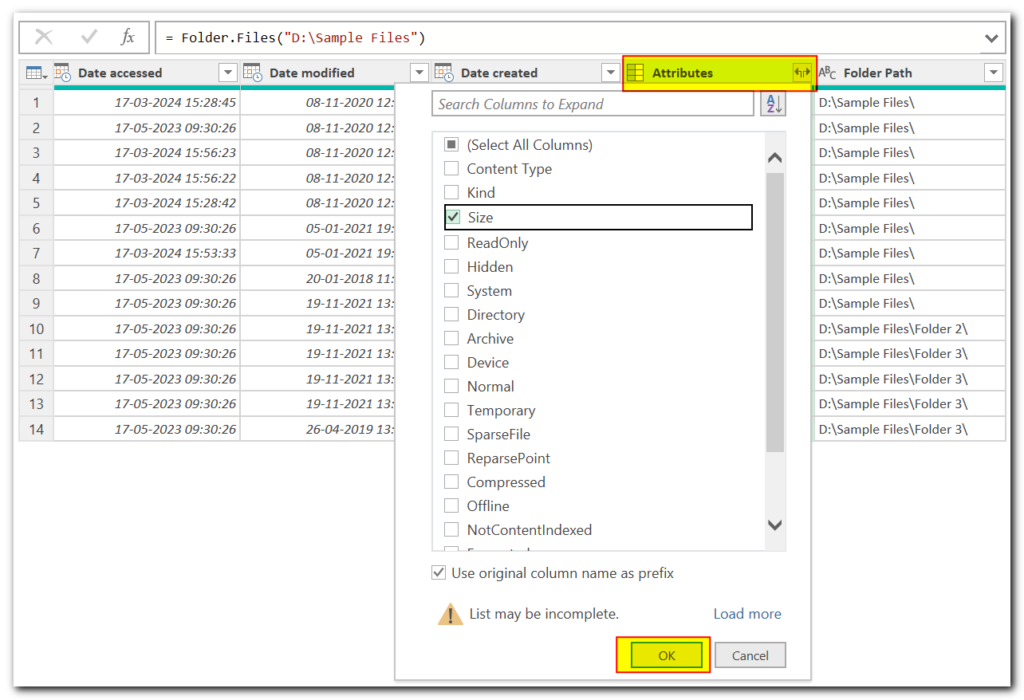
- Add additional details like file size from Attributes.
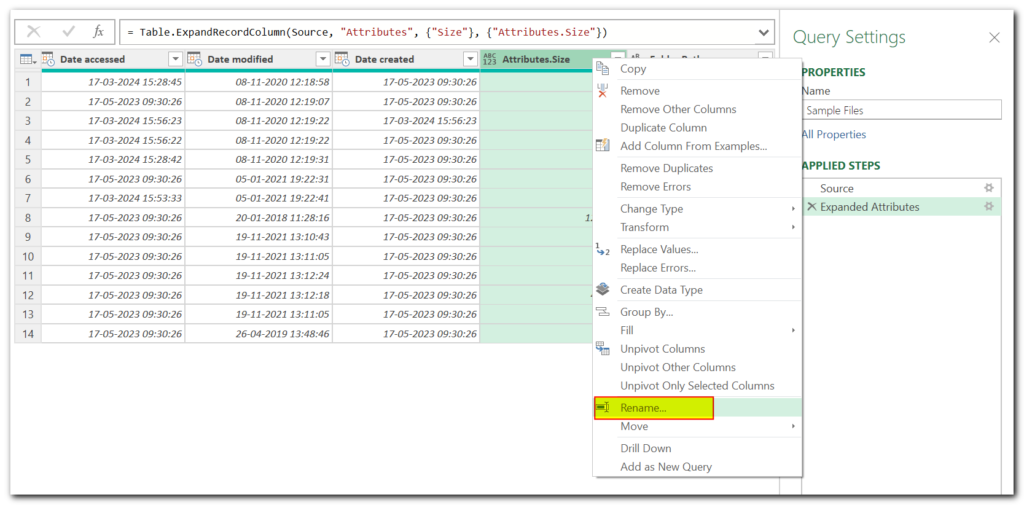
- Rename the column for clarity.
Step 4: Load the Data
Once you’ve customized the query to your satisfaction, click on “Close and Load.”
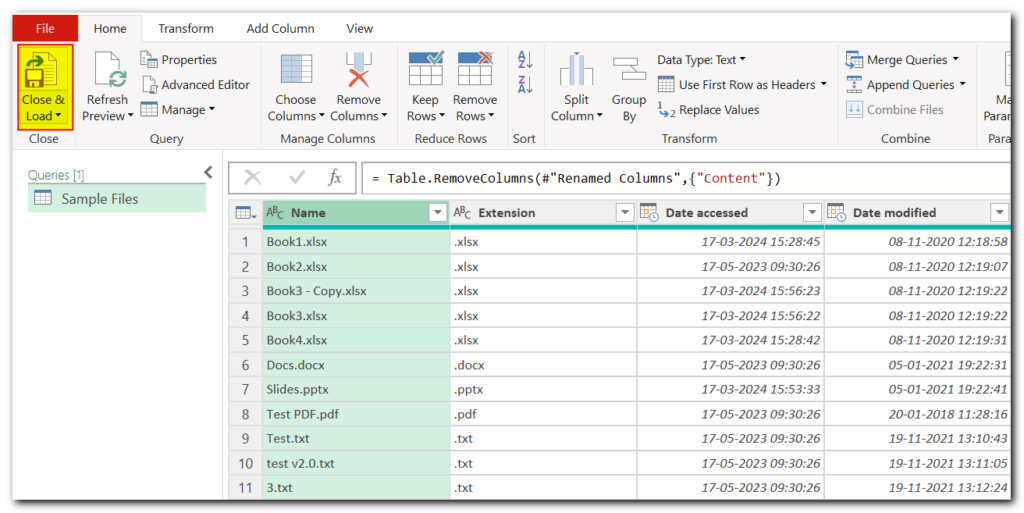
A table containing the list of files and their details will be generated in Excel.
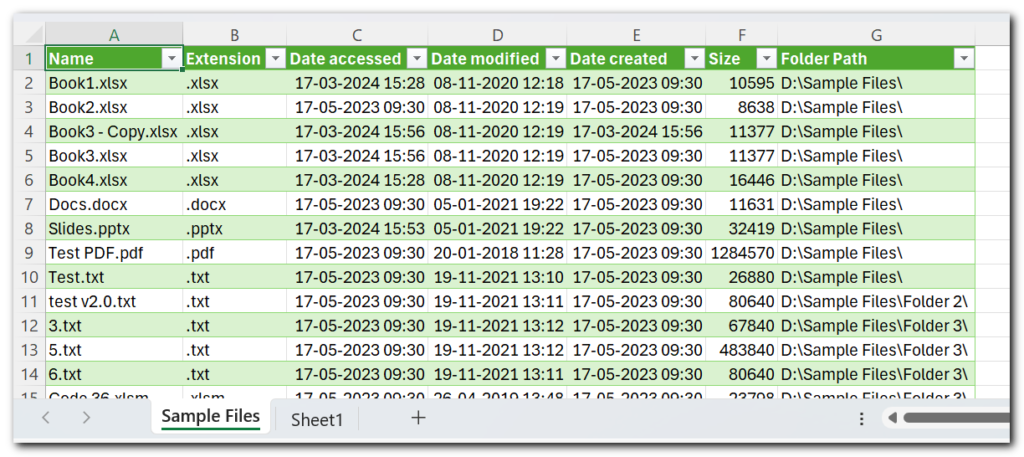
Step 5: Filter the Results (Optional)
Return to the query editor using Query > Edit if you wish to filter the results.
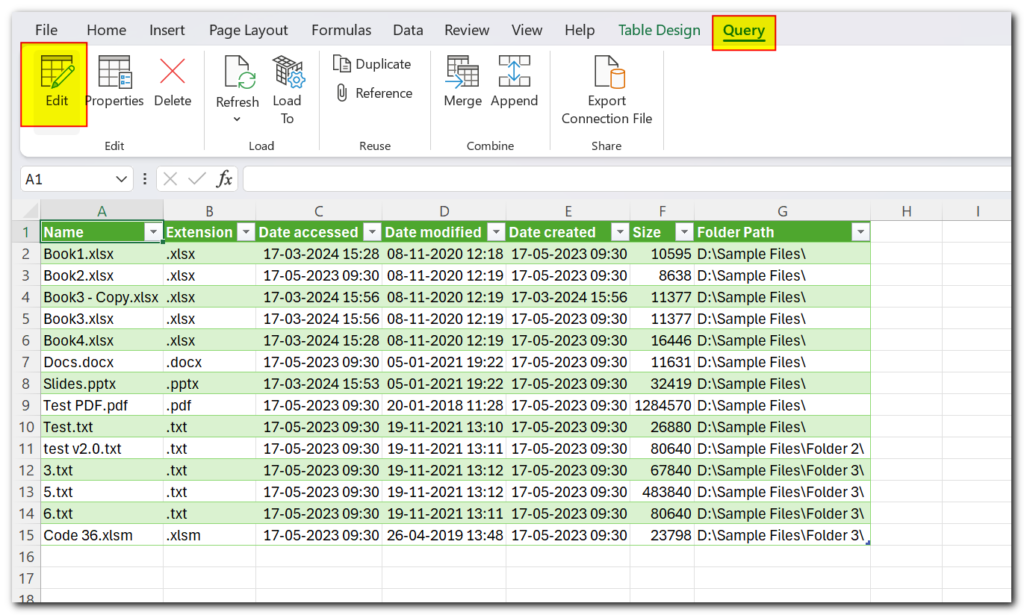
Apply filters based on file extensions to include only specific types of files, such as Excel files.
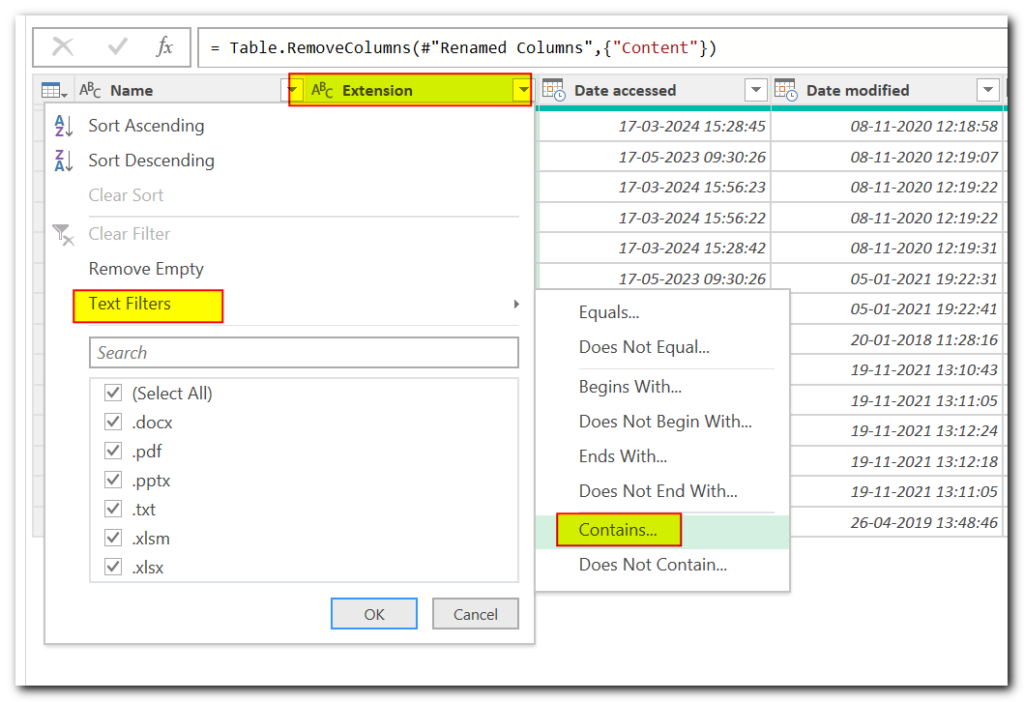
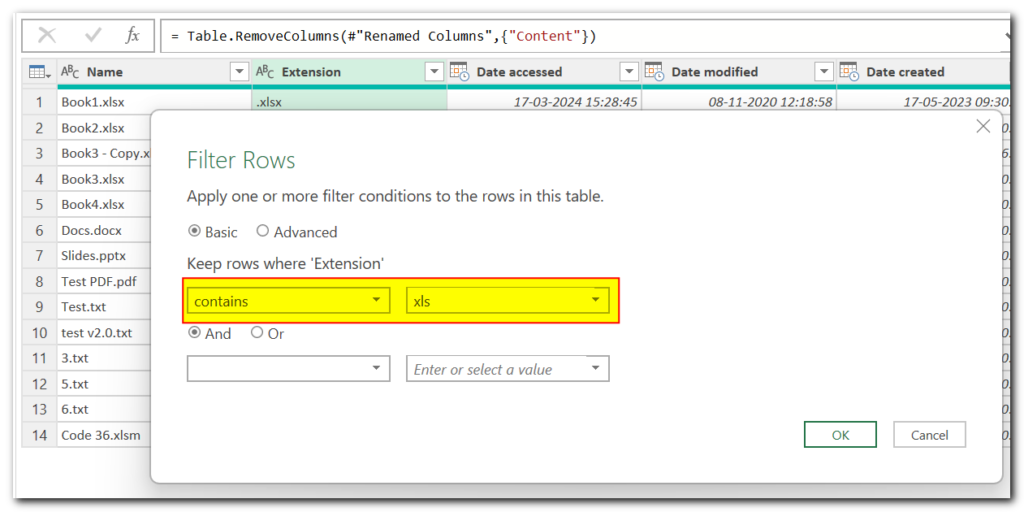
Step 6: Refresh the Data
To ensure your list stays up-to-date, right click on the result and click on “Refresh.
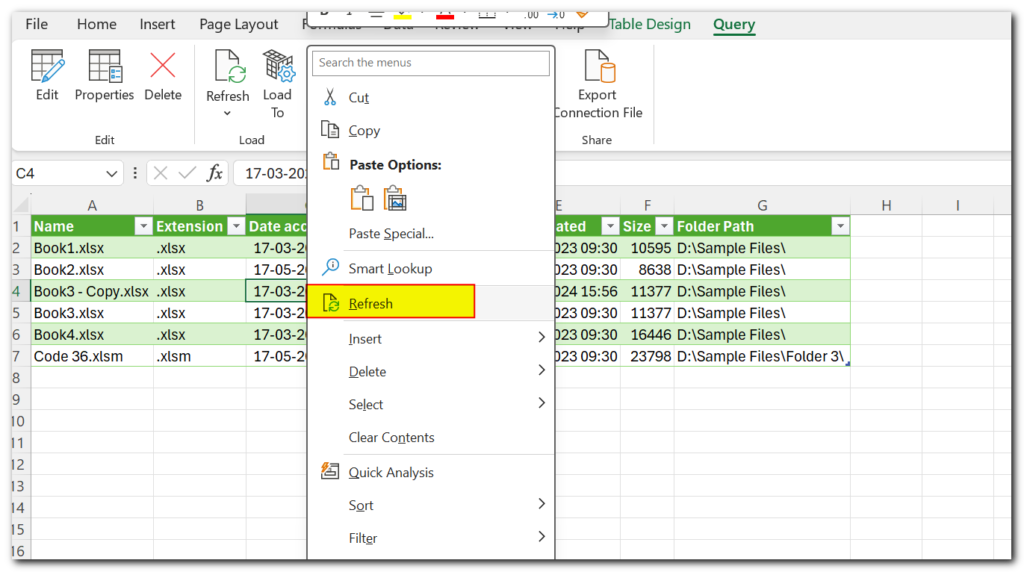
The list will update automatically, reflecting any changes made to the folder contents.
Conclusion
By following these step-by-step instructions, you can effectively use Power Query to extract a list of file names from folders and subfolders in Excel. This streamlined approach to file organization can help you stay organized and productive in managing your digital assets.
Download Practice File
Thank you for following along with this guide. We hope it helps you optimize your file management process and enhance your workflow efficiency.


