Excel Line Breaks Made Simple: Quick Tips & Techniques
In Excel, a line break lets you finish one line of text and begin another within the same cell. It helps create separate lines of information without needing to move to a different cell.

In the above image, Excel and Tips both are separated in 2 lines. So this is what exactly we are going to perform
In Excel, if you need different parts of a text to display on separate lines, you can use a line break. For instance, if you have an address with details like street, city, and zip code, a line break helps show each detail neatly on its own line within a single cell. This makes your information more organized and easier to read.
Shortcut Key to Insert Line Break in Excel
To add a line break in a cell, follow these steps:
- Double-click the cell to enter edit mode Or Press F2.
- Position the cursor where you want the line break.
- Press and hold the ALT key.
- While holding ALT, press Enter.
This keyboard shortcut helps you insert line breaks in cells quickly.
After following the steps, a line break will be added where you put the cursor. You can then seamlessly continue typing in the cell, and your text will automatically move to the next line. This allows for neat and organized content in the cell.
NOTE :-To see your text go to the next line, make sure the cell is in ‘Wrap Text’ mode. If it’s not turned on, even with a line break, your text might stay in one line. You can find the ‘Wrap Text’ option in the Home tab on the ribbon.
The keyboard shortcut is a fast way to add a line break for a few cells. If you have many cells, check other methods explained later in this tutorial.
Using Formulas to Insert Line Breaks in Excel
You can use a formula to include a line break in the result. This is handy when you want to combine information from different cells, like an address, and have each part appear on a separate line. In the example below, a formula is employed to merge various address components, with a line break added between each part.
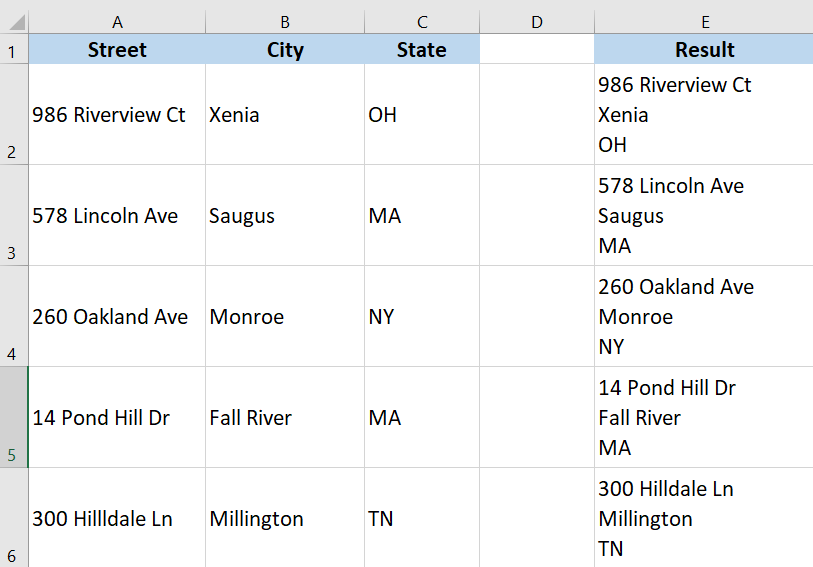
Here’s a formula that puts a line break in the result:
=A2&CHAR(10)&B2&(CHAR(10)&C2)
In the formula above, we use CHAR(10) to create a line break in the result. CHAR(10) is a code that represents a line feed in ASCII. When we position CHAR(10) where we want the line break, it tells the formula to break the line at that point.
Alternatively, you can use the CONCAT formula instead of the “&” symbol
=CONCAT(A2,CHAR(10),B2,CHAR(10),C2)
If you’re using an older version of Excel that doesn’t have CONCAT, you can also use the old CONCATENATE formula.
=CONCATENATE(A2,CHAR(10),B2,CHAR(10),C2)
If you’re using Excel 2016 or an older version, you can use a formula called TEXTJOIN to combine cells or ranges more efficiently.
=TEXTJOIN(CHAR(10),TRUE,A2:C2)
NOTE :- To see a line break in a cell, remember to turn on ‘Wrap Text.’ Without ‘Wrap Text,’ adding Char(10) won’t affect how the formula looks in the cell.
Note: If you are using Mac, use Char(13) instead of Char(10).
"Simplifying Line Breaks: Using Define Name in Excel"
“If you find yourself using CHAR(10) or CHAR(13) frequently, it’s more convenient to create a defined name for it. This means giving it a short name that you can use in formulas instead of typing out the entire CHAR(10).
Here’s how to do it:
- Go to the Formulas tab.
- Click on ‘Define Name’.

In the box that pops up for a new name, type in these details:
Name: LB (you can pick any name you like, just avoid spaces)
Scope: Workbook
Refers to: =CHAR(10)
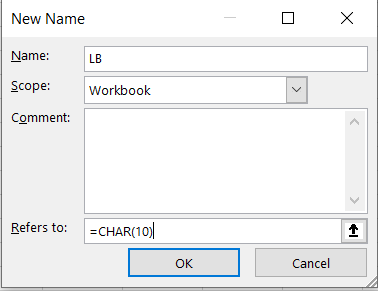
Click OK.
Now, you can use ‘LB’ instead of =CHAR(10).
So, the formula to combine addresses can be:
=A2&LB&B2&LB&C2
Using Find and Replace (the CONTROL J Trick)
This trick is awesome!
Imagine you have a list like the one below, and you want a line break every time there’s a comma in the address.
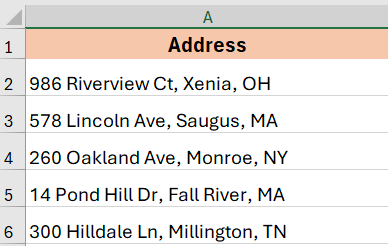
If you want to add a line break after every comma in an address, you can easily do it using the FIND and REPLACE dialog box. Here’s how:
- Open the FIND and REPLACE dialog box.
- Choose the cells where you want to replace the comma with a line break.
- Click the Home Tab
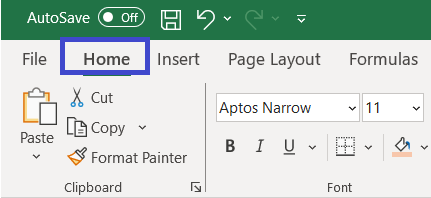
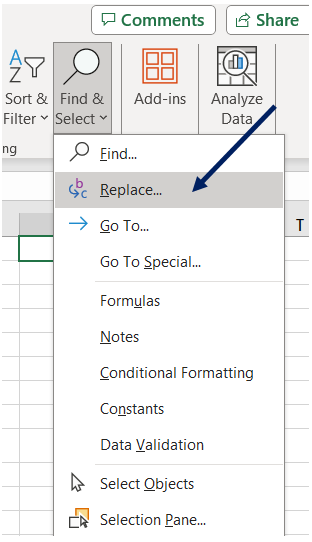
4. In the Editing group, go to Find and Select, and then choose Replace (or use the keyboard shortcut Control + H). This action will open the Find and Replace dialog box.
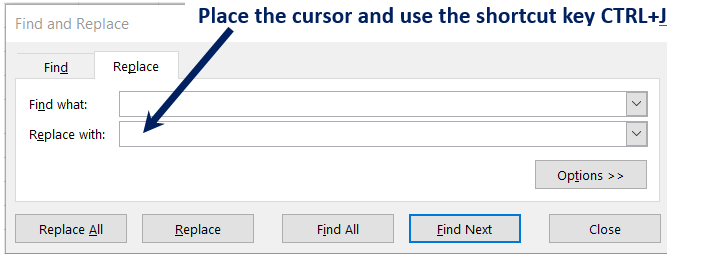
5. In the Find and Replace dialog box, enter comma (,) in the Find What field.
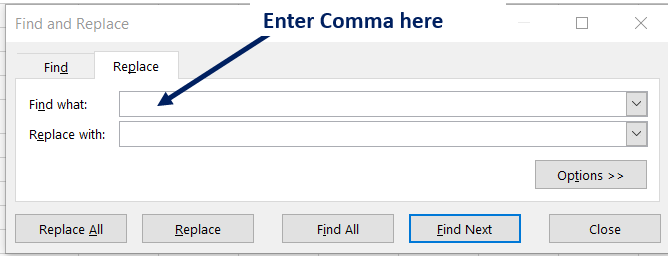
6. Click in the Replace field and use the keyboard shortcut – CONTROL + J (hold the Control key and press J). This will insert a line break in the field. You might see a blinking dot in the field after using Control + J
7. Click on Replace ALL.
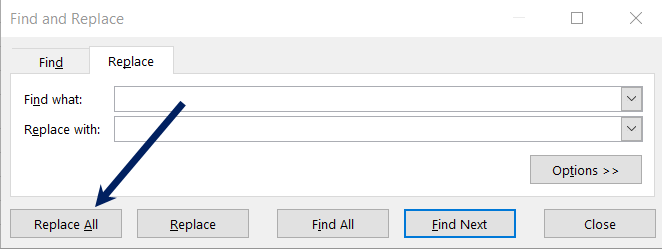
Ensure that ‘Wrap Text’ is Enabled.
The mentioned steps remove commas and replace them with line breaks.
Keep in mind, if you press CTRL+J twice using the keyboard shortcut, it adds two line breaks, resulting in a gap of two lines between sentences.
You can also follow the same steps to remove all line breaks and replace them with a comma (or any other character) by reversing the entries in ‘Find What’ and ‘Replace with.


