How to Delete Blank Rows in Excel – 6 Easy Methods
Blank rows in Excel can be a real hassle, making it harder to move around and work with your data. But don’t worry—there are plenty of easy ways to get rid of these unwanted rows. In this post, we’ll explore 6 simple methods to Delete Blank Rows from your Excel data. Let’s learn “How to Delete Blank Rows in Excel?”
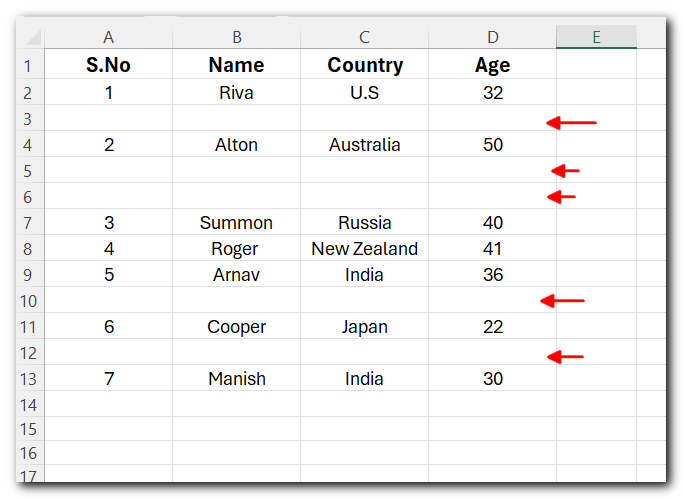
Table of Contents
Method 1:- Manually Delete Blank Rows in Excel
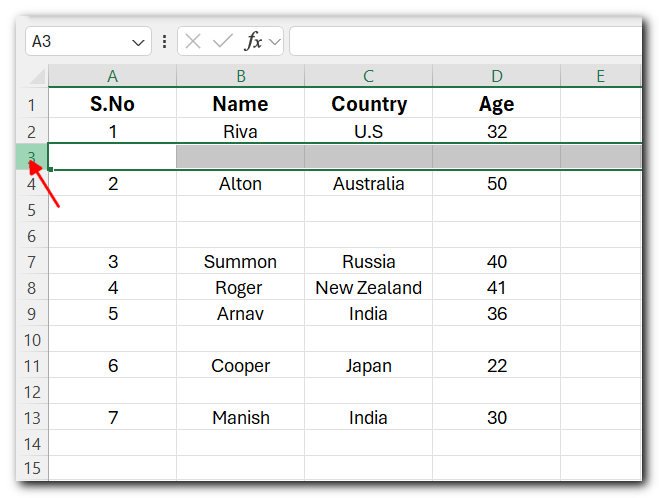
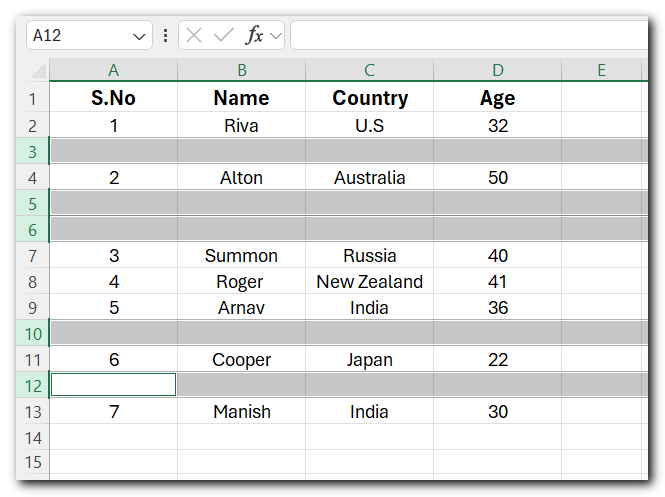
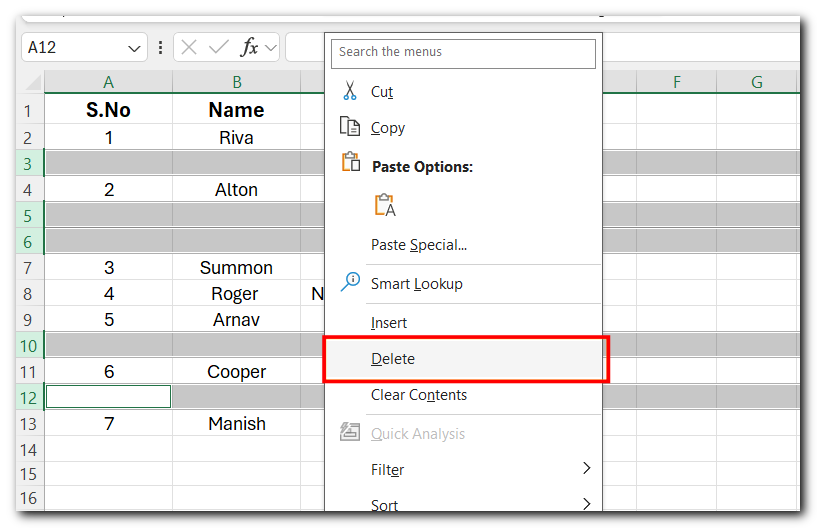
Excel will delete all the selected blank rows, and you’re good to go.
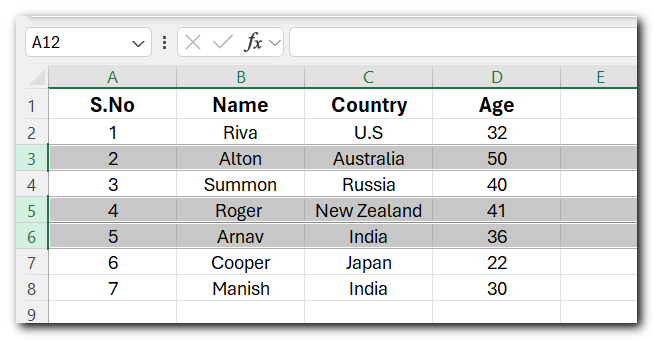
Method 2:- Keyboard shortcut to Delete blank rows in Excel
To delete blank rows in Excel using a keyboard shortcut:
- Select the rows you want to delete.
- Press Ctrl + – (minus key).
This will delete the blank rows.
Method 3:- Delete Blank Rows in Excel using Home Tab
- Select the blank rows you want to delete by clicking on the row numbers.
- Go to the Home tab.
- In the Cells group, click on Delete.
- Choose Delete Sheet Rows from the drop-down menu.
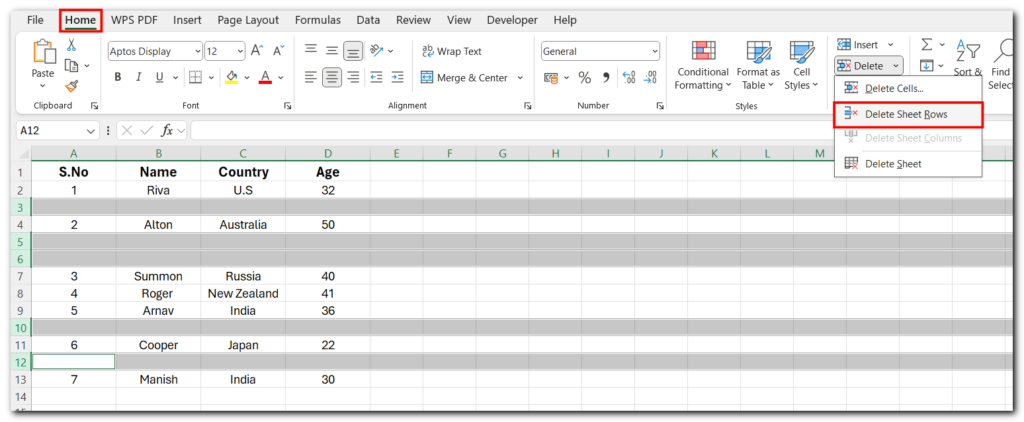
This will remove the selected blank rows from your worksheet.
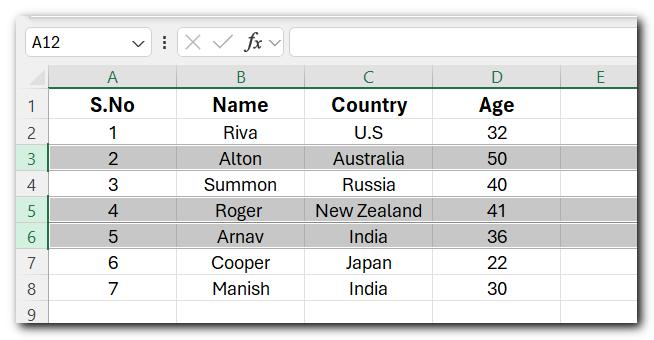
Method 4:-Delete Blank Rows in Excel Using Go To Special
Select the range where you want to find and delete blank rows. To select the entire sheet, click the box between the row numbers and column letters.
Press Ctrl + G (or F5) to open the Go To dialog box.
Click Special.
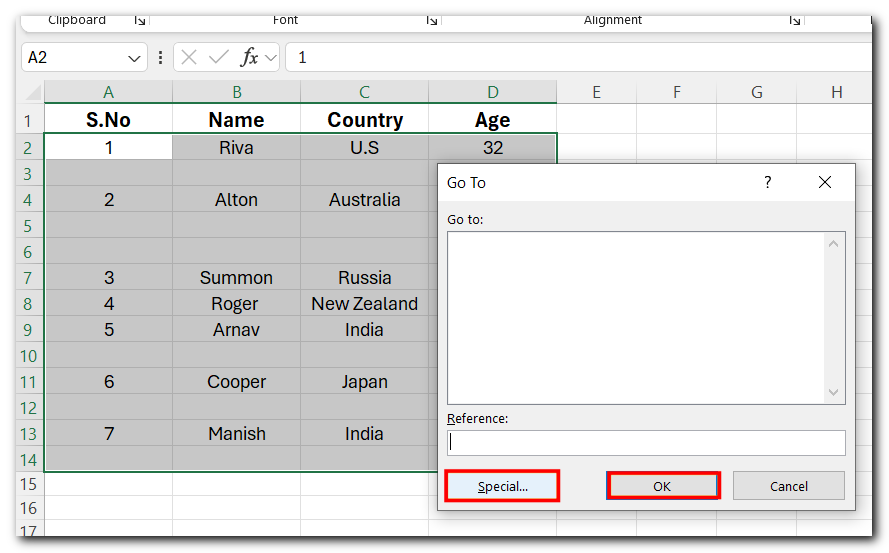
4. Choose Blanks and click OK. This will highlight all the blank cells/rows
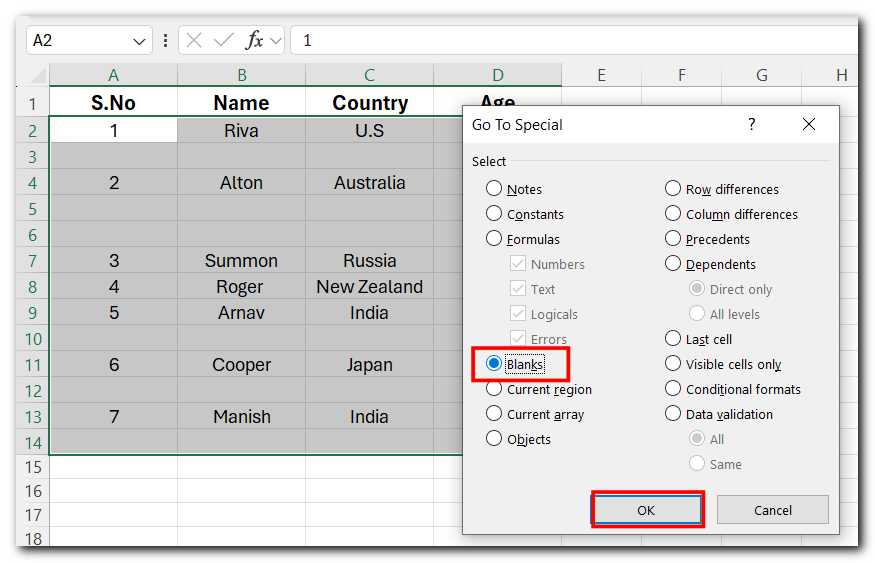
5. With the blank rows selected, right-click and choose “Delete” from the menu.
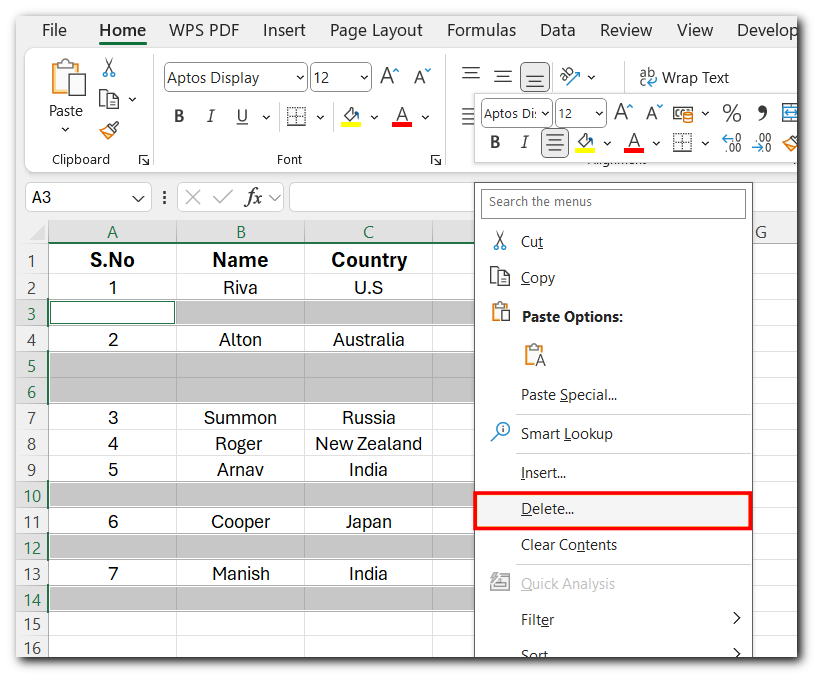
In just a few seconds, we can effortlessly discover and remove hundreds of blank rows from our data, even when they’re spread across a lengthy excel data. It’s like magic!
Method 5:- Delete Blank Rows in Excel Using Find Command
This method is quite similar to the Delete Blank Rows Using Go To Special technique. The main difference is that we’ll be using the Find command to select our blank cells.
Go to the Home tab ➜ press the Find & Select command ➜ choose Find from the menu. OR There is also a keyboard shortcut we can use to open the Find menu. Press Ctrl + F on the keyboard.
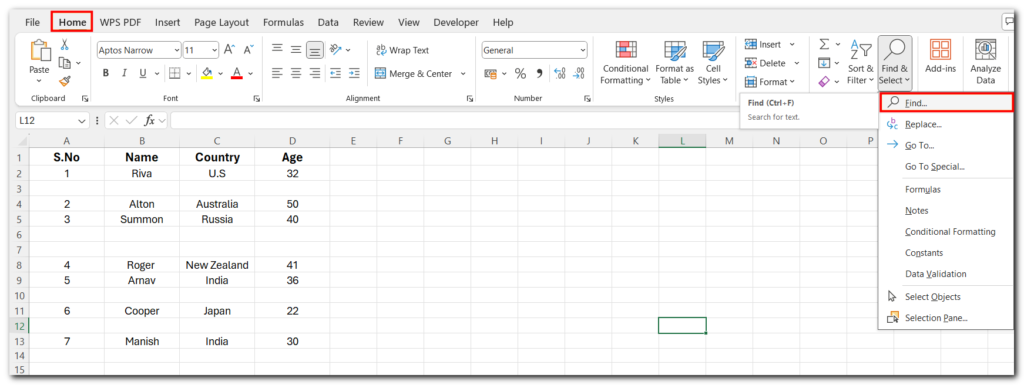
Here’s a simpler way to say it:
- The Find & Replace menu will pop up.
- Click on the Advanced options to expand them.
- Keep the Find what box empty.
- Check the Match entire cell contents option.
- Set the Search to within the Sheet.
- Choose Look in Values.
- Click Find All to list all the blank cells.
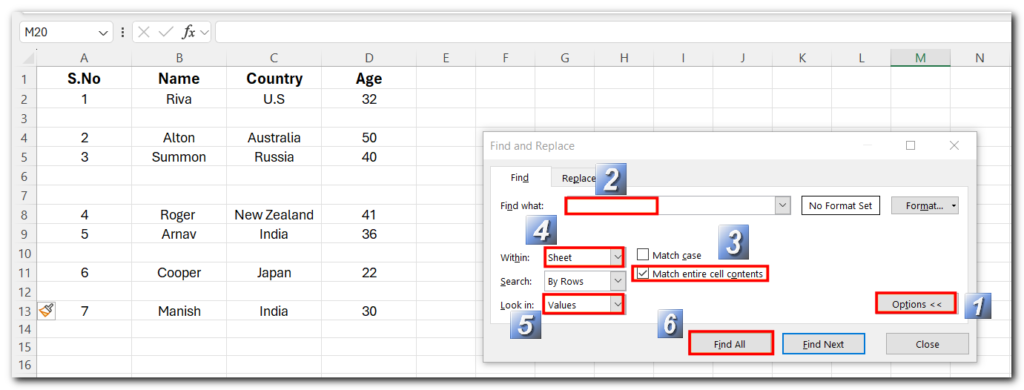
This will show a list of all the blank cells found in the selected range at the bottom of the Find menu.
To select them all, press “Ctrl + A”. After that, close the Find menu by clicking the Close button. You can now delete all the blank cells just like before.
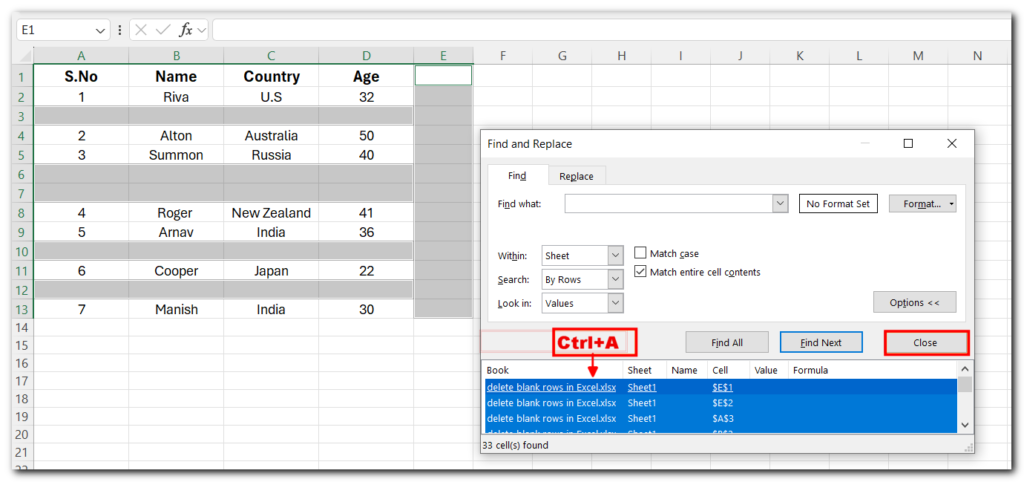
With the blank rows selected, right-click and choose “Delete” from the menu.
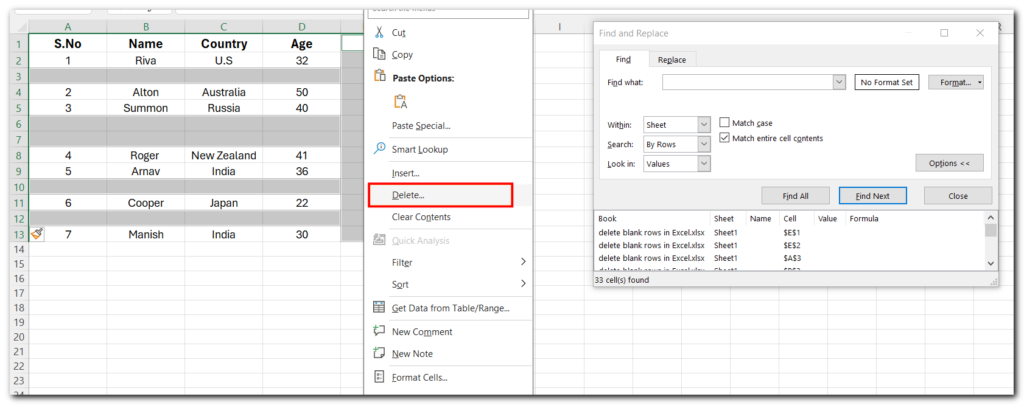
It’s like magic—we can find and delete hundreds of blank rows in our data in just a few seconds.
Method 6:- Delete Blank Rows in Excel Using Filters
We can also use filters to find blank rows and delete them from our data.
Click on a cell within your data to select.
Go to the Data tab and click Filter to apply the filters. OR We can also add filters to a range by using the Ctrl + Shift + L keyboard shortcut.
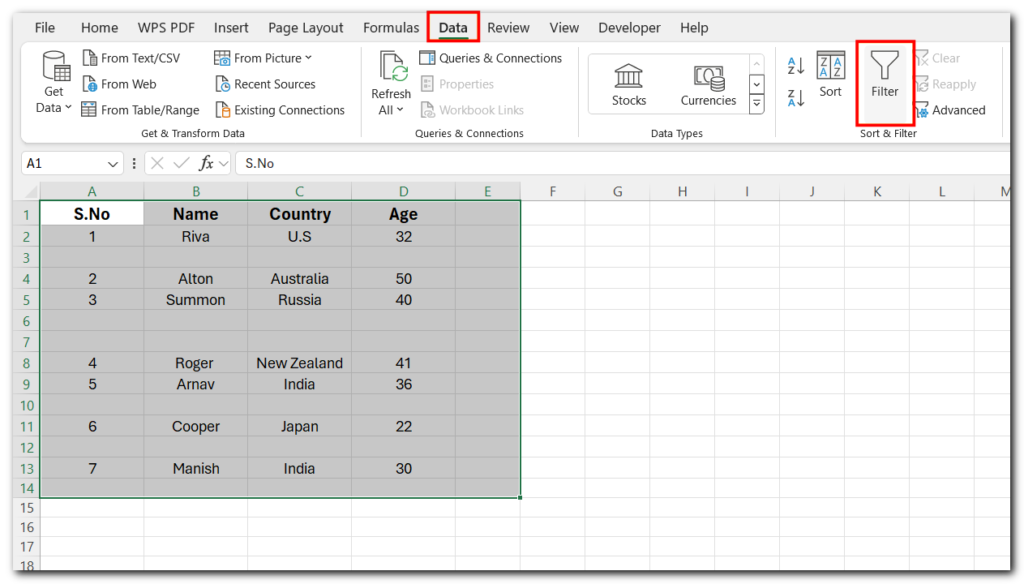
- This will add sort and filter options to each column heading, allowing us to filter out the blanks.
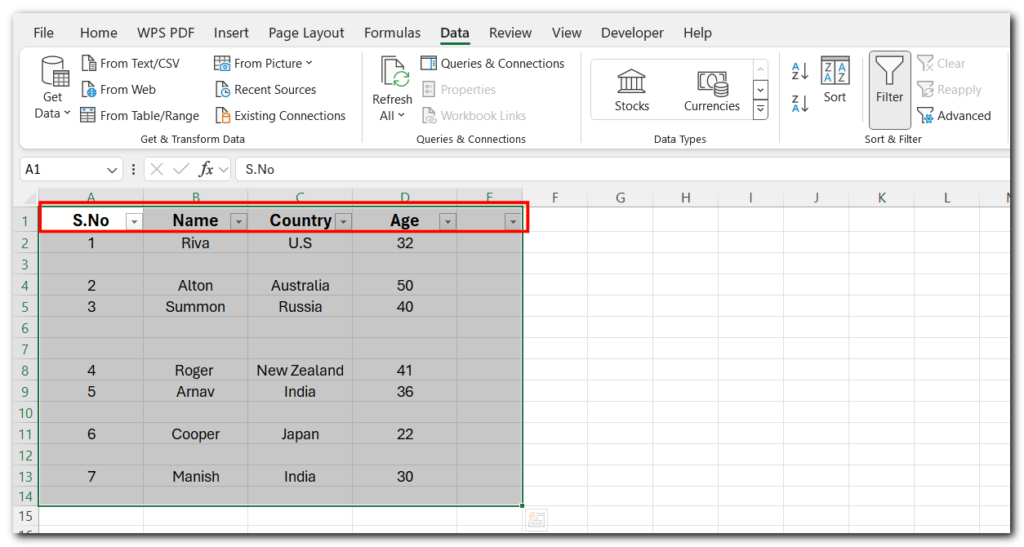
- Click the filter toggle on one of the columns. Use the Select All option to uncheck everything. Then check Blanks. Finally, press OK.
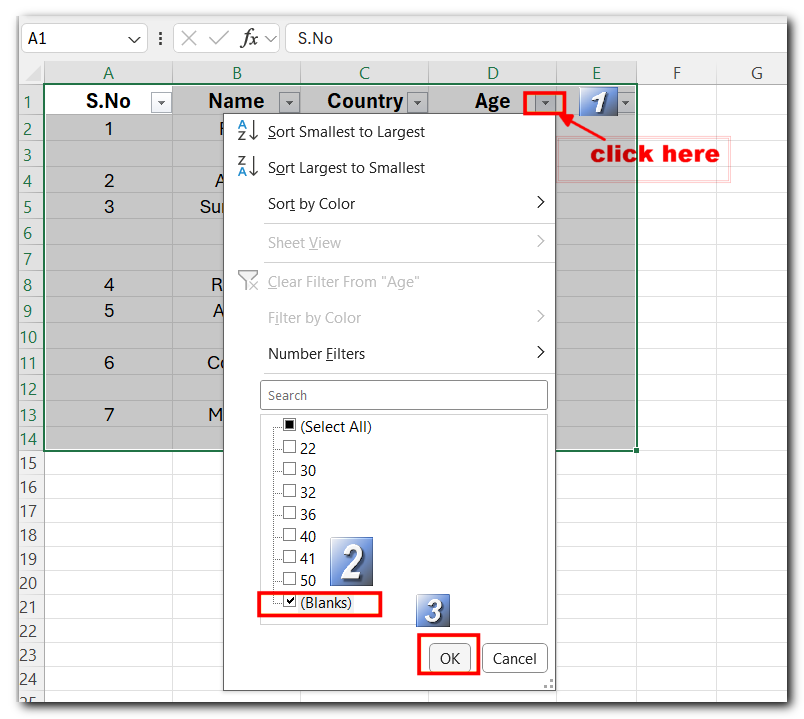
When we filter our data, the row numbers turn blue, and the rows with blanks are missing.
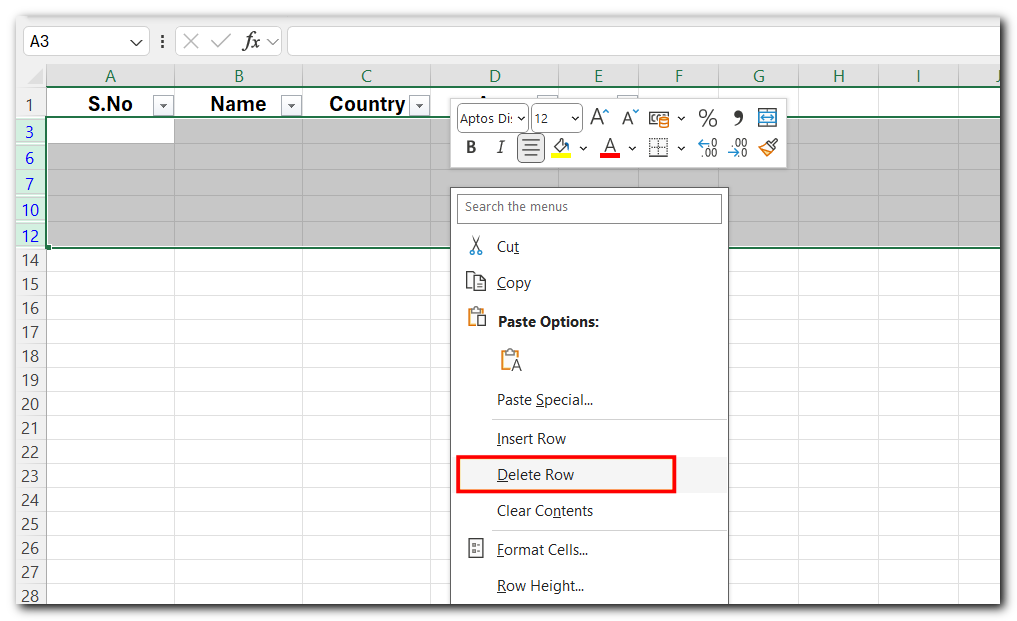
- We can select these blue-numbered rows and delete them using any manual method.
- When Excel asks if we want to delete the entire row, just click OK.
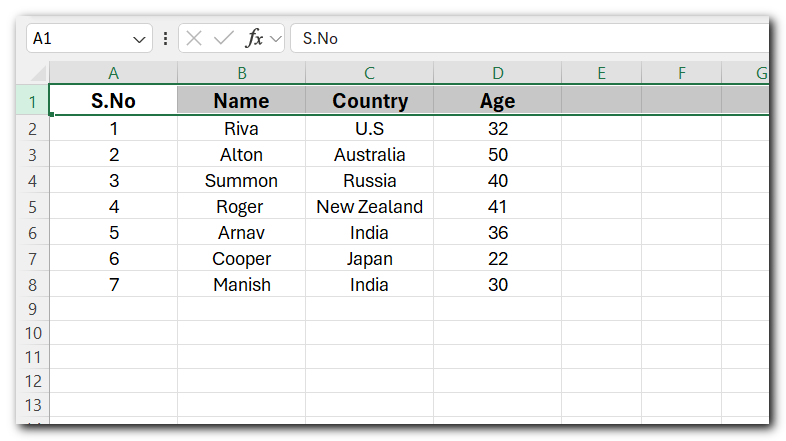
When we clear the filters, all our data will still be there but without the blank rows!
Conclusion
Blank rows can be annoying in our data.
Luckily, delete the blank rows are simple and there are many ways to do it.
My favorite method is using the Go To keyboard shortcut. It’s fast, easy, and effective.
Did I miss any methods? Share them in the comments below!


